Facebook
You can connect your Facebook account to Zammad, allowing you to
create tickets from posts and respond as comments. To configure it under
Channels > Facebook, you need the permission admin.channel_facebook.
Please note that you first and foremost should have a look at Meta’s documentation to get the most recent and substantial information for the steps on their side. Some steps on Meta’s side are only mentioned here as prerequisites, as this is outside the scope of this documentation.
Tip
The setup of the WhatsApp channel has similar prerequisites as the Facebook channel. So, if you managed to set one of them to up, you should have a look at the other one too. It could be a low hanging fruit! 🎉
Prerequisites
Permission to create an app inside your developer account and needed information for the app (see here)
Creating an App
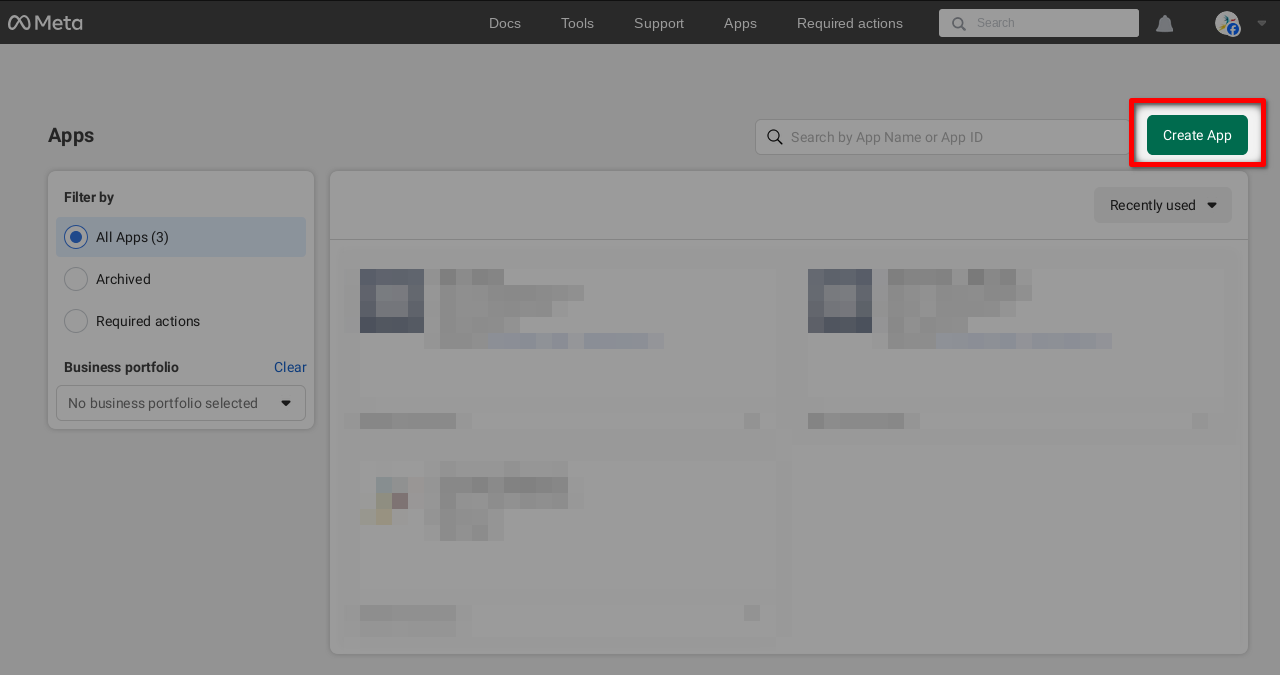
- Create a new app
Go to Meta’s app dashboard and create a new app.
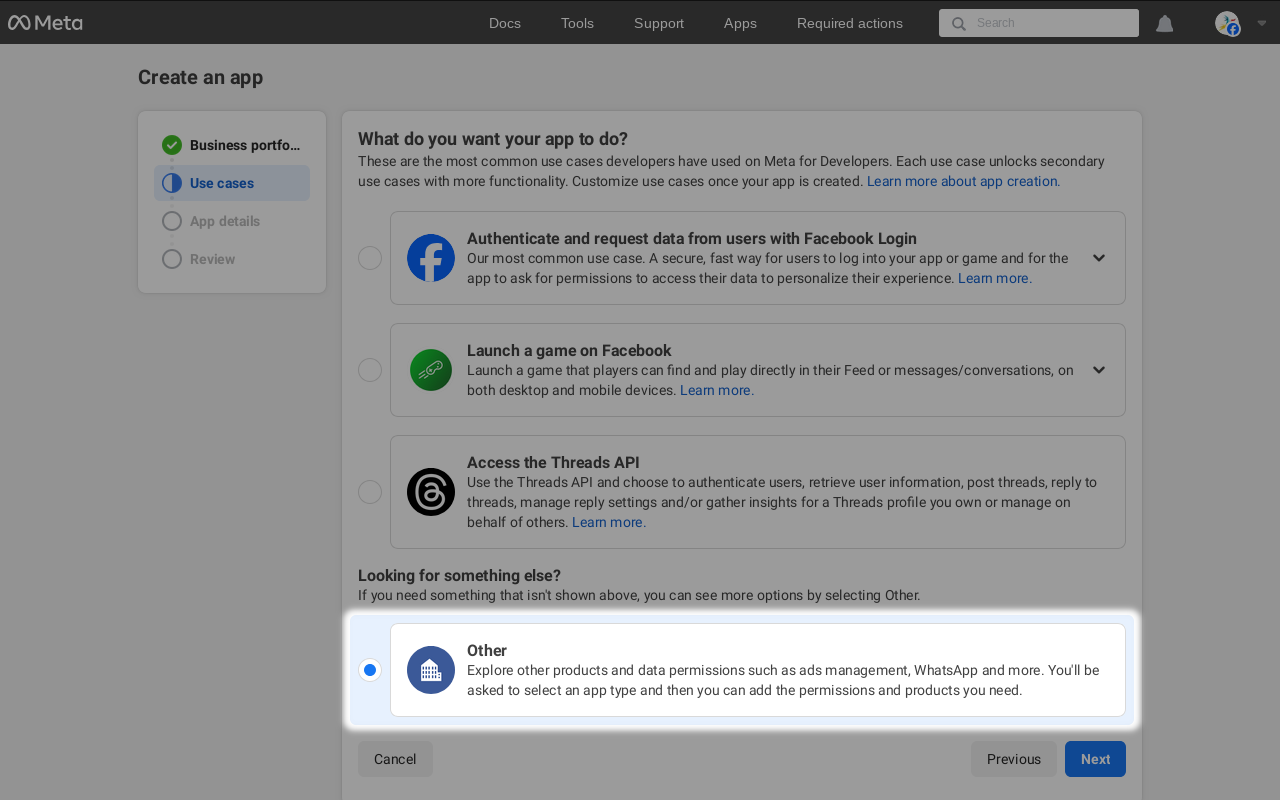
If you have more than one business portfolio, select the desired one.
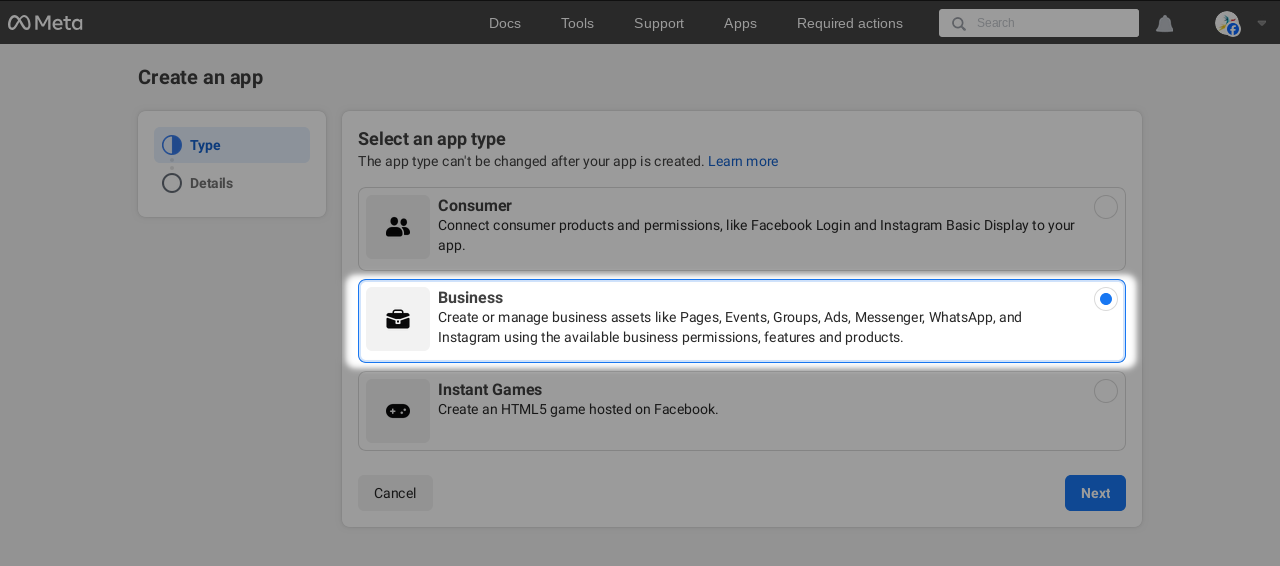
In the Use cases tab, select “Other” and “Business” app type.
In the next screen, provide a fitting app name, contact email address and select your business portfolio and finally click on
Create app.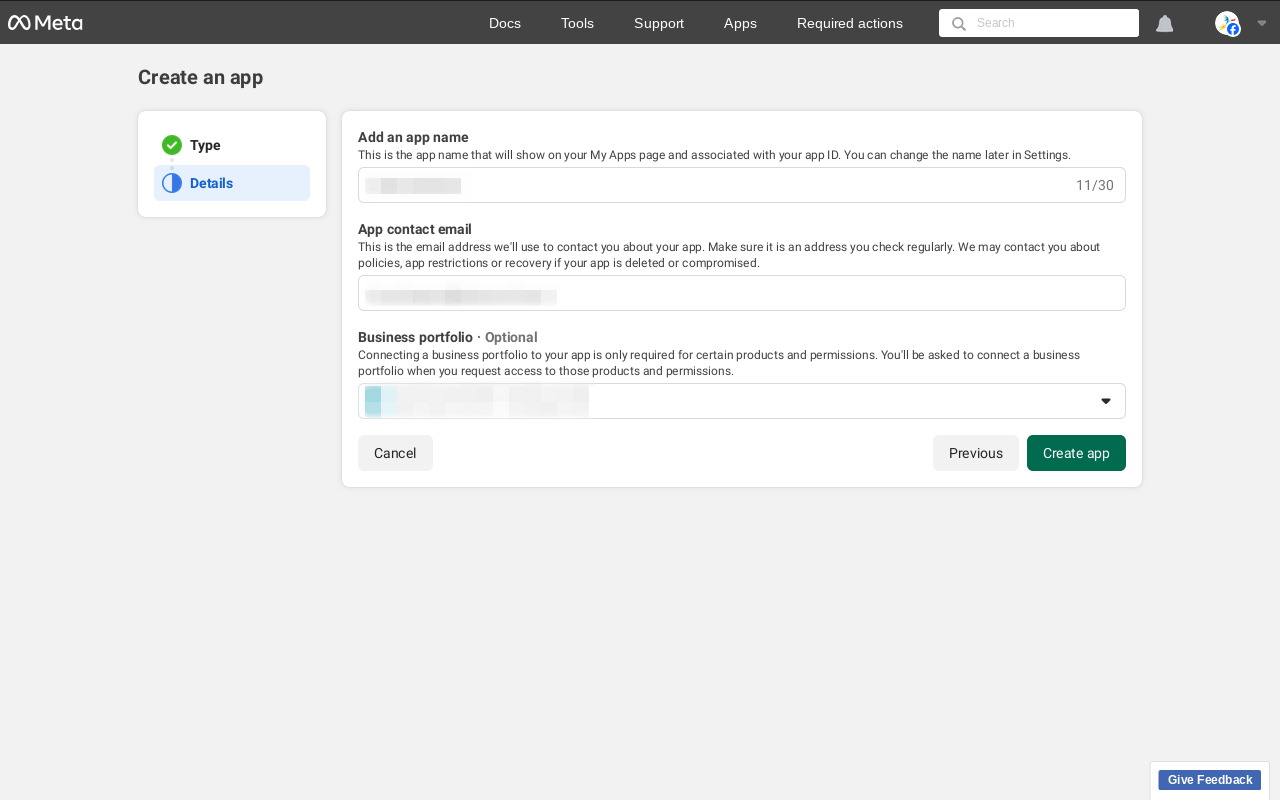
- Add a product to your app
After creating the app, you should see the app overview, where you can add a product to your app.
Scroll down and select Facebook Login for Business by clicking on the
Set upbutton.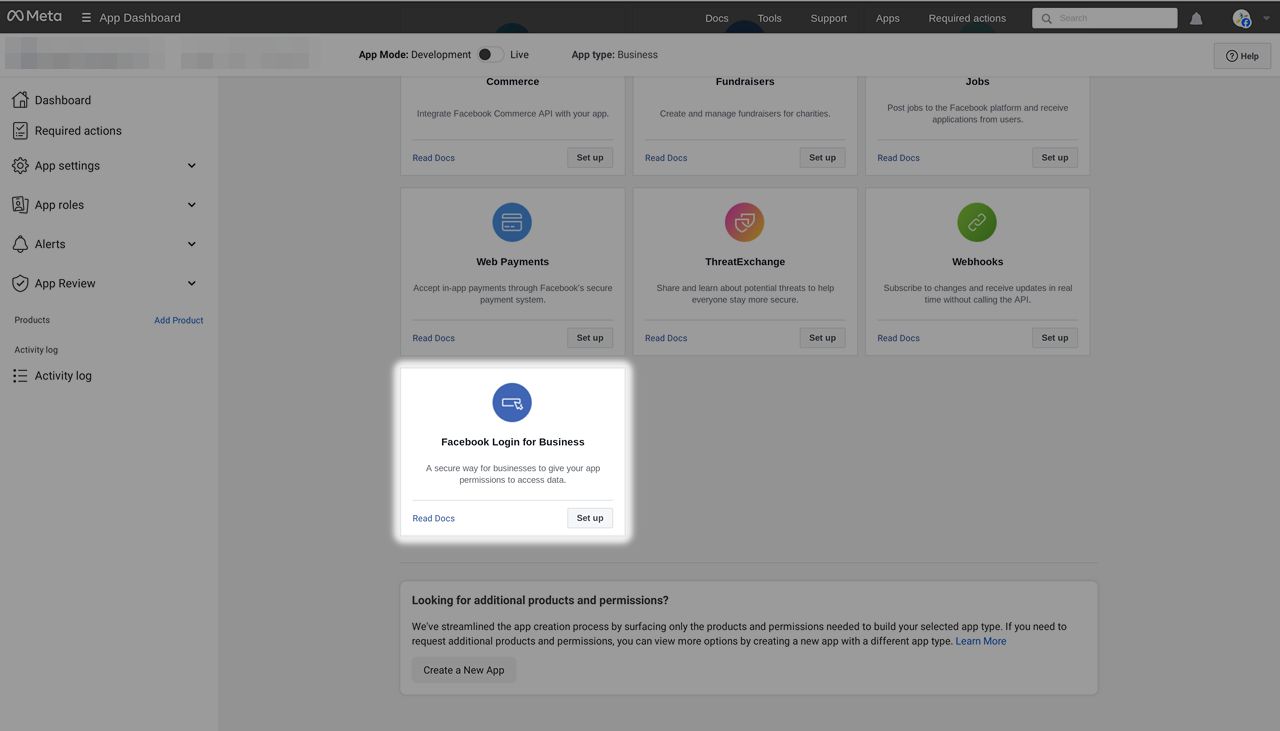
In the following screen, go to Valid OAuth Redirect URIs and provide the URL of your Zammad instance, followed by
/api/v1/external_credentials/facebook/callback. You can copy this URL from Zammad if you click on theConfigure Appbutton in Zammad’s Facebook channel configuration.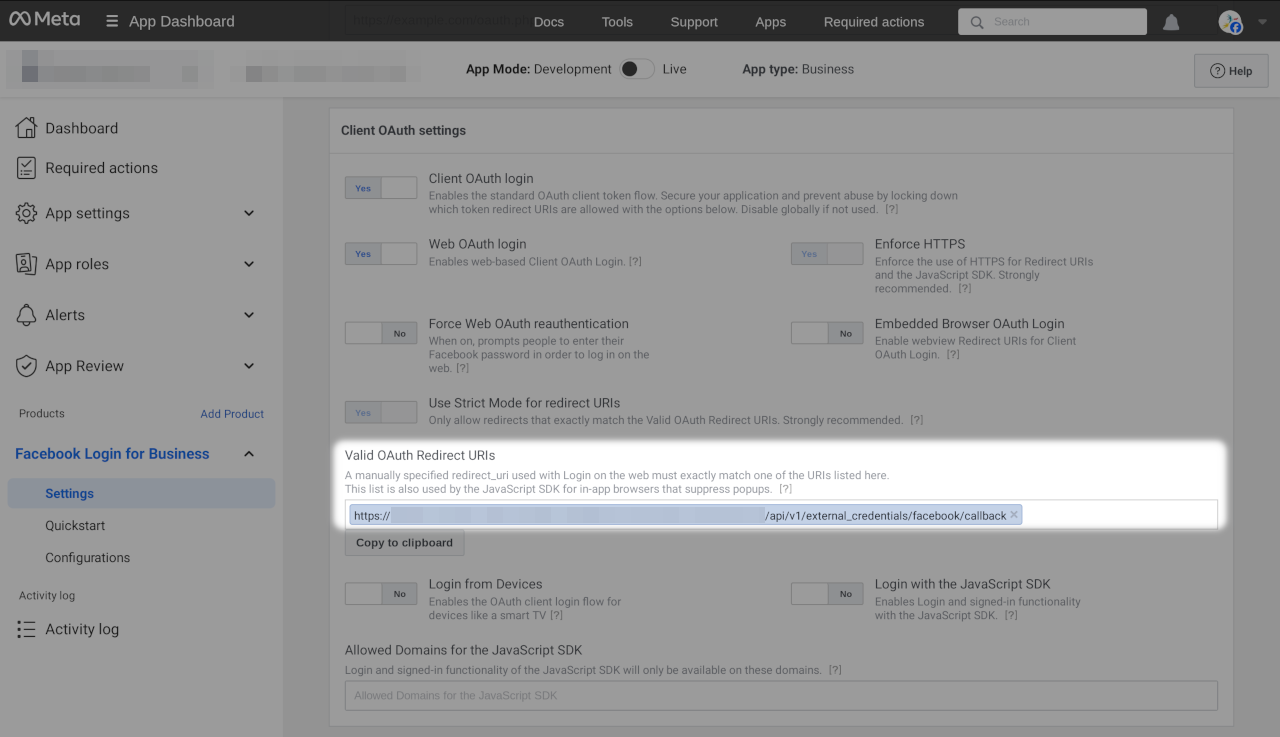
Continue with the next step on Zammad’s side by connecting the Facebook with Zammad.
Connect Facebook App in Zammad
If not already done, go to the Facebook channel section in the admin interface
in Zammad and click on Configure App. This will open a dialog where you
have to provide the app ID as well as the app secret.
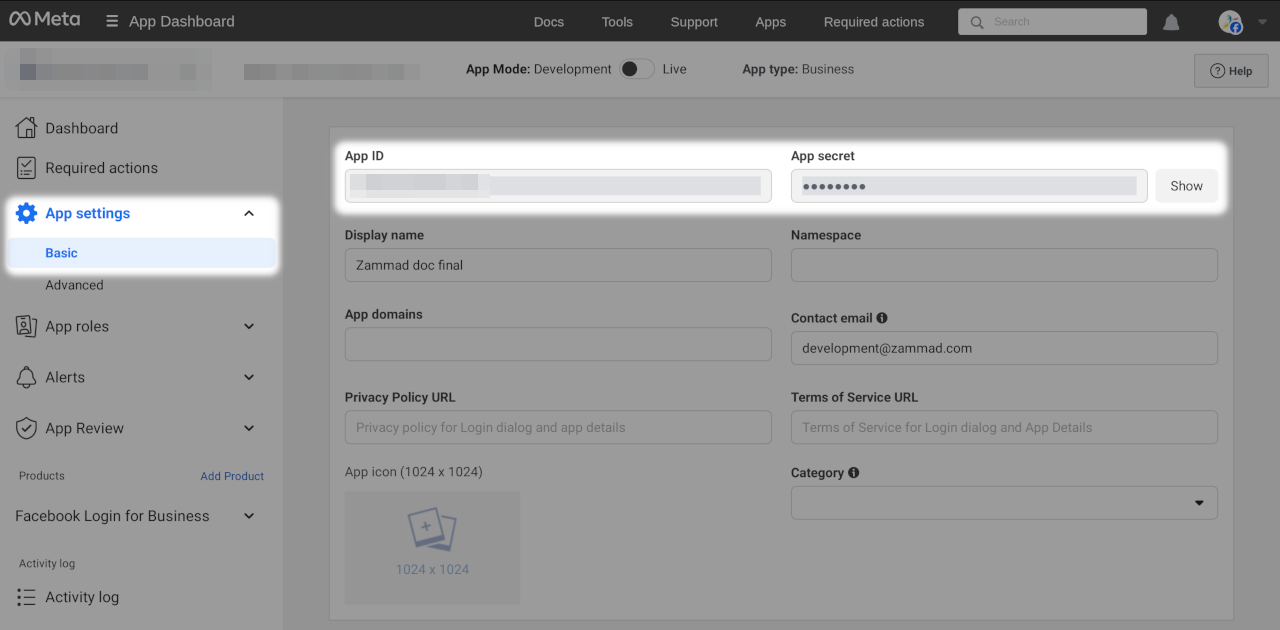
Head over to the Meta app dashboard and switch to App settings > Basic.
Copy the App ID and the the App secret (after clicking on the
Show button) and paste both to Zammad in the corresponding fields.

Confirm it by clicking on Submit and continue with the next step.
Add Facebook Account to Zammad
After you successfully connected your app with Zammad, you can now add
an account by clicking the Add Account button in Zammad. This redirects
you to Facebook and you will see an account selection dialog. Confirm by
clicking on Continue as ... or log in with another account.

In the next screen you can choose if you want to receive tickets from all pages
or just selected ones. Choose what fits your needs and confirm by clicking
Continue.

Finally, you see an overview about the requested permission. Click on Save
and Got it in the next screen.

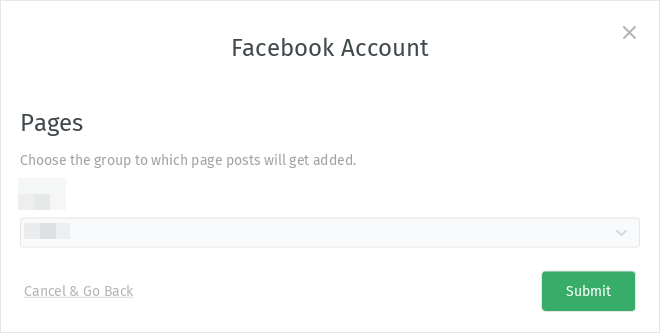
You are now redirected to Zammad where you can see a configuration dialog.
Select a group you want to handle the Facebook tickets and click on Submit.
After that, you are technically ready to go. However, you have to do some additional steps, which aren’t covered in this documentation:
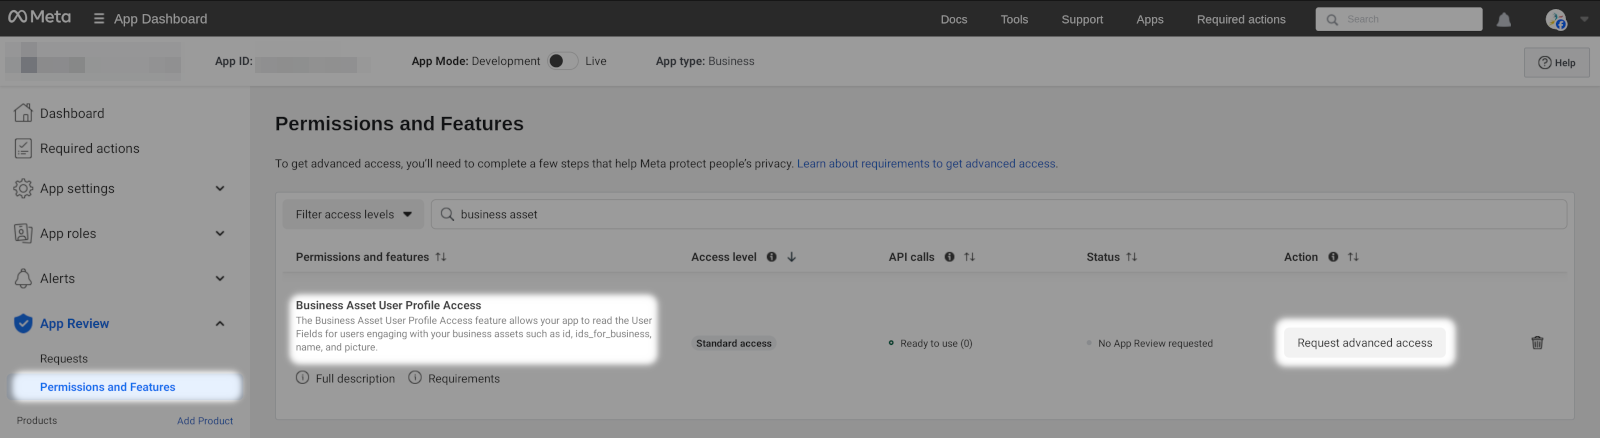
Request advanced access for your app (see screenshot below)
Request a business review if your business is not already reviewed
Switch your app from development to live mode