First Steps
After the basic setup of Zammad with the getting started wizard, you will see hints how to use the UI (see “Intro” below if you want to see them again). After these hints were shown, the dashboard is presented to you which is basically the starting page of Zammad. This dashboard provides some useful information for the agents. You can switch to the First Steps section on top of the page to see useful links for the start. Depending on your configuration and permission, your list may look different.
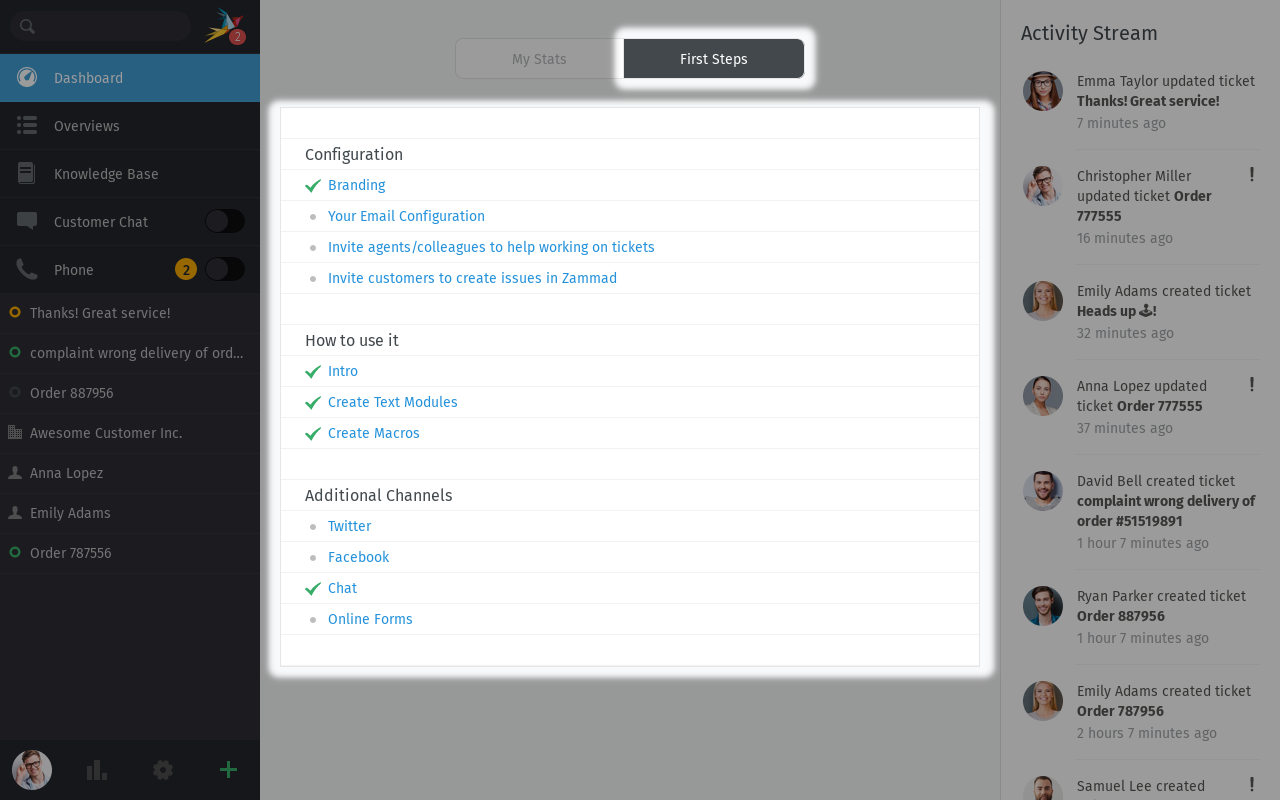
Configuration
- Branding
Link to the branding section in the settings.
- Your Email Configuration
Link to the email channel section in the settings.
- Invite agents/colleagues to help working on tickets
Here you can invite agents/colleagues to work with you in Zammad. It opens a dialog in which you can provide details and assign a role.
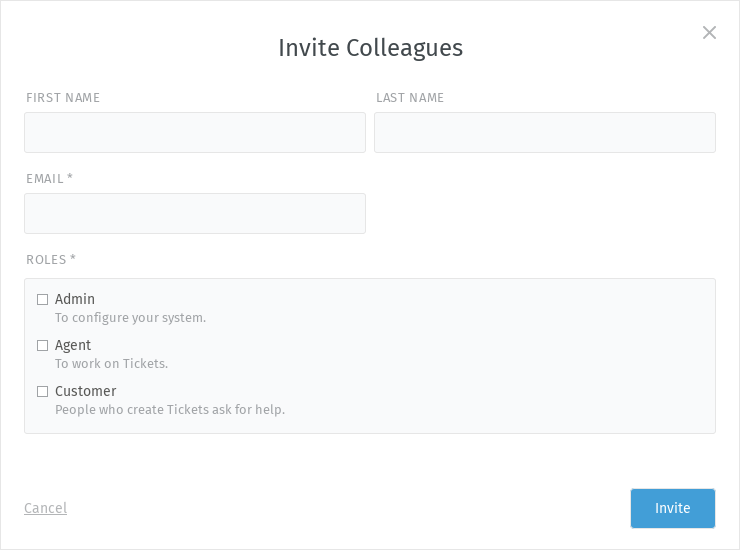
Make sure to have configured the roles and permission according to your needs before inviting. To send the invitations via email, you have to configure an email notification channel before too.
- Invite customers to create issues in Zammad
Similar to the invitation of agents, you can invite customers to create tickets/articles and to view them in the web UI. Of course, your customers can create tickets anyway if they send you an email to a address which is configured as an email channel. They even get an account created automatically. For more information, a good starting point is the users section.
How to Use it
- Intro
Here you can re-activate the hints which you have seen after finishing the getting started wizard. Click on
Nextto see all of them or click on the X-button on the top right corner to close them.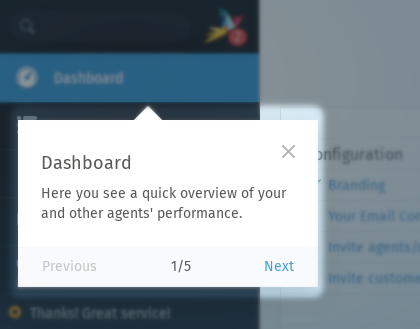
- Create Text Modules
Link to the text module section in the settings.
- Create Macros
Link to the macro section in the settings.
Additional Channels
Link to the Facebook channel in the settings.
- Chat
Link to the chat channel in the settings.
- Online Forms
Link to the form channel in the settings.