Form
Configure a feedback or contact form for your website so customers can get
in touch with you without using their email client.
Usually, such contact forms generate an email which is sent to somebody who
forwards it and so on. With Zammad, it’s quite easy to integrate these forms
into your website and directly generate tickets out of them. To configure a form
under Channels > Form, you need to have the permission
admin.channel_formular.
Limitations
The fields provided by the form are limited to:
Name
Email
Message
Attachment upload (optional)
Checkbox for custom agreement text (optional)
Only one dedicated form per instance is possible.
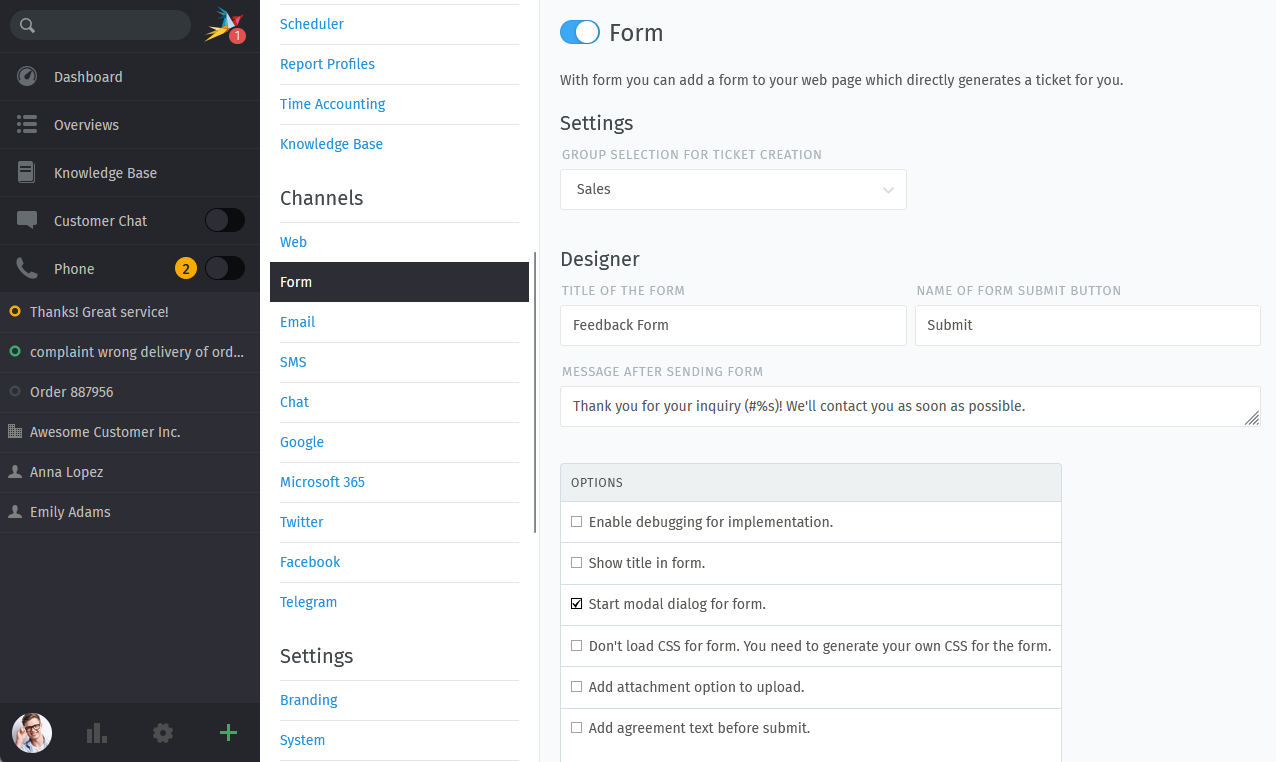
Settings
Zammad comes with certain settings for forms.
- Active
By default, the form channel is inactive. Use the switch to activate this channel. The form will not be displayed on your website if the channel is not active. This does not affect the form preview on the channels setting page.
- Group selection for ticket creation
The group you set here defines where tickets should be created if they’re supplied by Zammad’s web form.
Spam Protection
The form channel provides two methods to protect against unwanted submissions.
- Honeypot
When enabling the honeypot, the form includes a hidden field that is invisible to regular users (hidden via CSS). Users are therefore not able to fill it out. Bots on the other hand may fill in all they find. If the field is filled out on submit, it indicates bot activity and the submission is rejected. This is a basic bot protection and doesn’t open a connection to any third-party providers.
- CAPTCHA
A CAPTCHA is a challenge to verify that the user is human. Depending on your chosen service provider, the verification may be done in different ways. Common approaches are to display a puzzle or riddle which the user has to solve (e.g. distorted text, image selections) or to measure the behavior of the user (e.g. interaction times), either invisible or showing an indicator of the verification. The following providers are available:
ALTCHA
Cloudflare Turnstile
hCaptcha
Friendly Captcha
Google reCAPTCHA
Google reCAPTCHA Enterprise
The required configuration depends on your chosen provider. For ALTCHA, no configuration is required and the CAPTCHA is not visible to the user. The other providers require a sitekey and a secret. Google allows you to adjust the minimum score and its enterprise version requires an API key.
Note
If the target website of the form script uses Content Security Policy (CSP), you may have to adjust your rules to allow additional resources (connection to your provider, fetch and execute scripts, etc.). Check out the documentation of your CAPTCHA provider and of your used website stack since this highly depends on them.
If a CAPTCHA provider is enabled, the form’s API endpoint is also protected and expects additional parameters.
Designer
This section helps you to configure your form. If you’re happy with what you’ve chosen, you get a code you need to copy to your website.
Warning
The designer’s changes are not stored anywhere in Zammad. This means that the provided source code needs to be copied every time you change settings here.
- Title of the form
Choose the heading of the form. This is only relevant if you choose to display the form title.
Default:
Feedback Form- Name of form submit button
If Zammad’s default display name of the submit button does not fit, you can provide your own wording with this option. It will be used every time the form is shown.
- Message after sending form
After users click the submit button, a message gets shown with the ticket number of the newly created ticket. Example for default configuration:
Thank you for your inquiry (#31015)! We'll contact you as soon as possible.
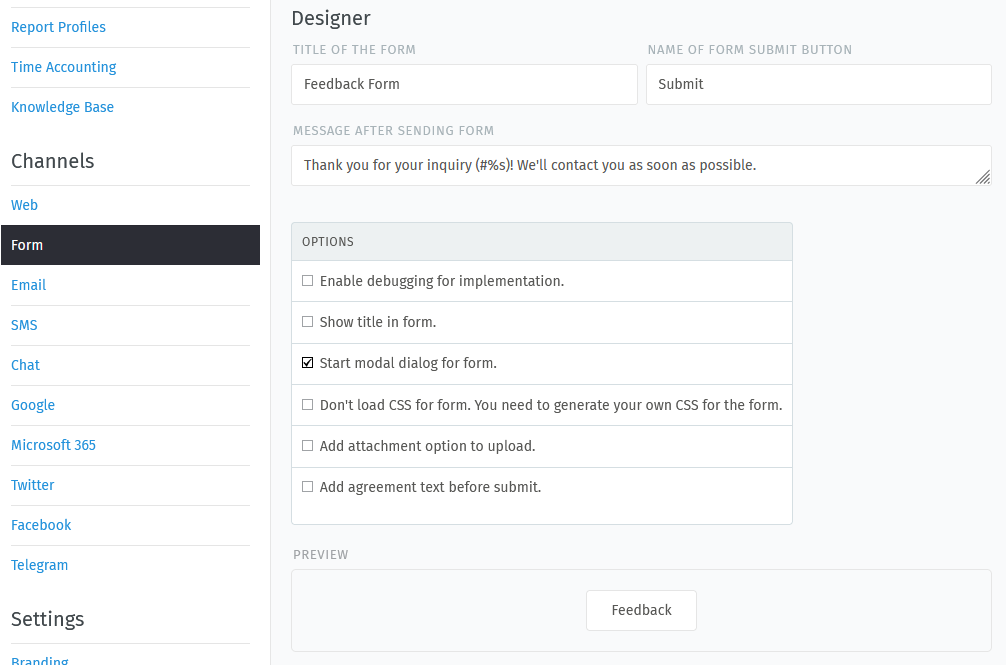
- Options
Zammad provides the following additional configuration options for your form.
- Enable debugging for implementation
This option activates detailed debug information in your browser’s developer tools console.
Warning
This option should not be active on productive forms!
- Show title in form
This setting is related to Title of the form and will provide the form title within the form dialog if selected.
- Start modal dialog for form
If selected, the form will be opened in a modal by clicking a button. Not selecting this option allows you to natively integrate the form within your website’s body.
No matter what you select here, the form is always loaded completely if your user browses the page which contains the form. This option is set by default.
- Don’t load CSS for the form. You need to generate your own CSS for the form.
By default, Zammad’s form comes with basic CSS. This may not fit your website’s design or even interfere with it. Selecting this option allows you to freely design the form without having to overwrite existing directives.
- Add attachment option to upload
Allows your user to upload one attachment to the form.
The allowed attachment sizes is not limited. The only limitation that applies is your web server’s upload limit.
Hint
If you are a SaaS customer, attachments are limited by the package you’ve chosen.
- Add agreement text before submit
If enabled, this allows you to define a text that the form displays together with a checkbox. With this, you can ensure your form conforms to legal requirements, e.g. by providing data privacy notes which the user has to accept before submitting the form. Use the
🔗 Weblinkbutton to add links to marked text passages.
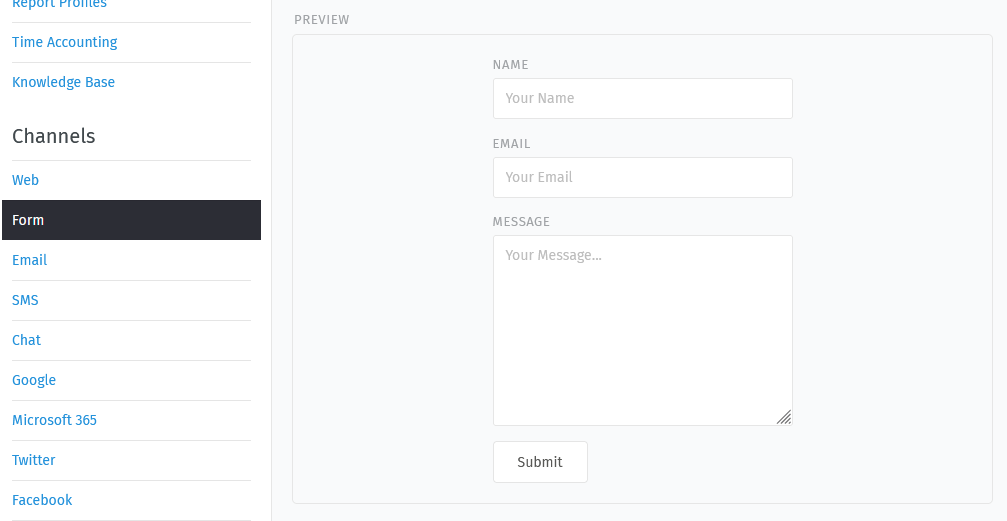
Preview
Below the form options, Zammad provides a preview section to visualize the
settings you’ve just chosen. By default, you’ll see a button named Feedback.
Clicking on the button will open the form modal. If the form channel is set
to active, you are already able to create tickets; even from the preview.
Requirements
The requirement section provides you with everything you need in order to apply Zammad’s web form to your website. It basically consists of two parts.
- Header section
The first code block provides you with Zammad’s current jQuery dependency. This script section usually belongs to your website’s header section.
The channel form suggests the following script tag, which loads the javascript library required from an external site. This may not suit your local requirements. You can use a locally hosted jQuery version, however the version is fixed.
<script src="https://code.jquery.com/jquery-3.6.0.min.js"></script>Warning
Do not mix jQuery versions - it’s likely to break something.
- Body section
The second code block is the actual code required for your form to run. It is updated automatically when changing settings in the designer above.
The first line containing
id="zammad-feedback-form"highly depends on the settings selected above. This part belongs into the place you actually want the form or form button to appear. The rest can either be placed at the same level or somewhere else on the same page.Note
These statements highly depend on your website. As you’re responsible for your own website, you’re on your own figuring out where exactly to place what.
Take the Zammad website as an example, the embedded form version can look like this if you apply custom CSS to it:

Potential Spam Issue
The form channel could be abused by sending a high amount of messages / tickets to your Zammad instance. If you do not use the form, you should disable it. If you want to use it, don’t worry: Zammad limits the maximum amount of created tickets based on different criteria. It also ensures that the provided email address is valid (with MX-check on the email’s domain).
Settings
You can change the default values by using the console settings below. Please keep in mind, that setting those values higher might lead to problems in terms of created tickets. Read the console section in the system documentation about how to use Zammad’s Rails console.
Option |
Default value |
Description |
|---|---|---|
|
|
Limits ticket creation per IP and hour to 20 tickets |
|
|
Limits ticket creation per IP and day to 240 tickets |
|
|
Limits ticket creation for forms to 5000 tickets per day |
Examples
Change the ticket creation per IP and hour to 10:
>> Setting.set('form_ticket_create_by_ip_per_hour','10')
Change the ticket creation per IP and hour to 50:
>> Setting.set('form_ticket_create_by_ip_per_day','50')
Change the ticket creation per day to 500:
>> Setting.set('form_ticket_create_per_day','500')
Further Options to Make it Harder
Another way to make it harder for bots to automate against your Zammad instance
is to change the location of form.js ( /opt/zammad/assets/form/form.js ).
Please keep in mind: if you change the location of form.js
(e.g. by copying), you need to ensure that your form.js stays up to date if
you update Zammad. It’s not recommended to delete form.js from its location
in that case, but to forbid access to it via your web server configuration.