Writing Assistant
Zammad’s writing assistant tools allow agents to apply AI based changes to
their text before saving or sending it. The permission
admin.ai_assistance_text_tools is required to access it in Zammad’s
admin section under AI > Writing Assistant. Make sure to configure an
AI provider before activating the feature. Otherwise, a
warning message will tell you to do so. Activate the feature by turning on the
switch.
Manage Tools
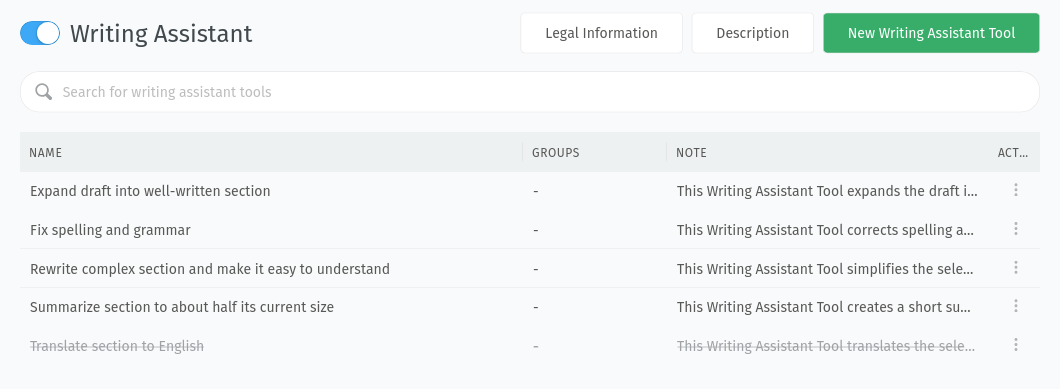
The main section of the screen shows a table where you can find all available writing tools. The table includes the name of the tool, the limitation to specific groups, a feedback summary, the last feedback reset time and a description.
General Handling
To create a new writing assistant tool, you can either start from scratch by
using the New Writing Assistant Tool button in the top right corner or clone
an existing one which is similar to your use case and adjust it. In both cases,
a configuration dialog gets opened where you can adjust the settings of the
writing assistant tool. You can find an explanation of each field in the
Configuration section below. Some use cases for individual writing
assistant tools could be:
Translation to a specific language
Apply company and/or sector specific wording
Change the mood of the text
Reduce or eliminate subjective or uninformative parts
Combine different instructions in one tool
The last column in the table includes the ︙ action menu where you can find the Clone and Delete action as well as download and reset the feedback (more on that below).
To edit a tool, simply click on its row. This opens a configuration dialog like for creating a new writing assistant tool where you can configure it.
Tip
Consider cloning an existing tool. So you can use the existing instructions as a starting point and adjust them to your needs. In case it doesn’t work as expected, you can still have a look at the instructions of the default tools.
Feedback Handling
Your agents can give feedback about the results of the writing assistant tools. This allows you to keep an eye on how well the tools are working and if adjustments are necessary. The agents can choose between a like (thumb up) and dislike (thumb down) reaction. For the dislike reaction, they can optionally add a comment to explain why they are not satisfied with the result.
You can see the ratio of likes and dislikes relative to the total tool usage in the feedback column of the table. To get more insights, you can download the feedback data (including your agents’ comments) by clicking Download feedback report in the ︙ action menu.
To Reset feedback, use the corresponding entry in the ︙ action menu. This clears the feedback ratio in the table and the already collected feedback is no longer present in the feedback report. A reset can be useful if you made adjustments to the instructions and want to start collecting feedback for the adjusted version. After a reset, you can still access the old feedback by downloading the global feedback report in the provider configuration.
Tip
To improve a writing assistant tool and compare the results before and after your adjustments, you have two options:
Apply changes to the tool and reset the feedback. Be aware that the feature specific feedback report no longer includes the feedback from the time before the reset. Either download the report before doing the reset or download the global feedback report from the provider configuration.
Clone the tool, deactivate the old and adjust the cloned one. This allows you to even compare the like and dislike ratio directly in the UI.
Configuration
Adding or editing a tool opens a configuration dialog. If you want to add a new tool, consider cloning an existing one to have a good starting point.
- Name
Add a name for the writing assistant tool. This is what your agents see when they open the writing assistant tool menu in an article they write.
- Custom instructions
Provide detailed instructions for the AI. This is a very important part of the configuration. They get included in the system prompt and tell the AI what to do with a given text. To get proper responses, the instructions should be constructed in a certain way:
They should be unambiguous and precise.
They can include one or more examples.
They should not include superfluous or redundant information.
They can specify an output format to keep the formatting and structure (namely HTML, see examples below).
You can even use variables by typing
::. This triggers a list of available variables where you can choose from. By using a variable, you can include object specific information in the instructions.Tip
To help you build good instructions, we collected a few snippets which may be helpful, depending on your use case. Pick fitting ones and include it in your custom instructions and/or consider cloning an existing text tool and adjust it.
- Maintain the language of the given input text for the output.
- Preserve all existing HTML markup without alteration.
- Ensure the output is well-formatted, engaging, and free of errors.
- Do not introduce new or unrelated ideas that change the original message.
- Preserve all HTML tags (e.g. links, images) and formatting (e.g. bold, italic) whenever it makes sense.
- Preserve all key information, main arguments, and important details.
- Groups
Define groups which can access the write assistance tool. If no group is selected (moved on the left side by clicking on it), the tool is available for tickets in all groups.
Note
Agents can access all writing assistance tools (including the restricted ones) during ticket creation as long as no group is selected.
- Note
Add a note about the write tool for other admins and explain what it it is for. This information gets displayed in the table of tools. It is not considered as context for the AI.
- Active
Set the writing assistant tool to active or inactive.
After creating or editing, you should test if the result is as expected. In case you are not happy, feel free to adjust the instructions until it fits your expectations.
Usage for Agents
If enabled, agents have access to the default tools as well as the custom tools which are available for the group or are not limited to any group. They simply have to select the text they want to check/change and select the writing assistant tool they want to use. The AI section in the user documentation includes additional information.