Preparation
Here you can find instructions for the required steps you need to take before you can use the WhatsApp channel in Zammad. Please note that these steps may change in the future, depending on changes on Meta’s side. You should also consider to read their docs if you have issues:
Prerequisites
Make sure your system is accessible from the internet because WhatsApp sends messages via webhooks to your system.
Make sure to have properly set up your FQDN in Settings > System (for the callback URL Meta will use to deliver new messages).
Create a Meta Business Account
If you don’t already have a business account, visit
https://business.facebook.com/overview and click on Create an account.
Have a look at
Meta’s documentation
if you have problems.
Create a Meta Developer Account
If you don’t have a developer account already, go to https://developers.facebook.com/docs/development/register and register a new account.
Create a Meta Developer App
While already logged in with your developer account, go to
https://developers.facebook.com/apps/. Click on Create App and follow the
steps below.
Enter a fitting name and provide a contact email address for your app:

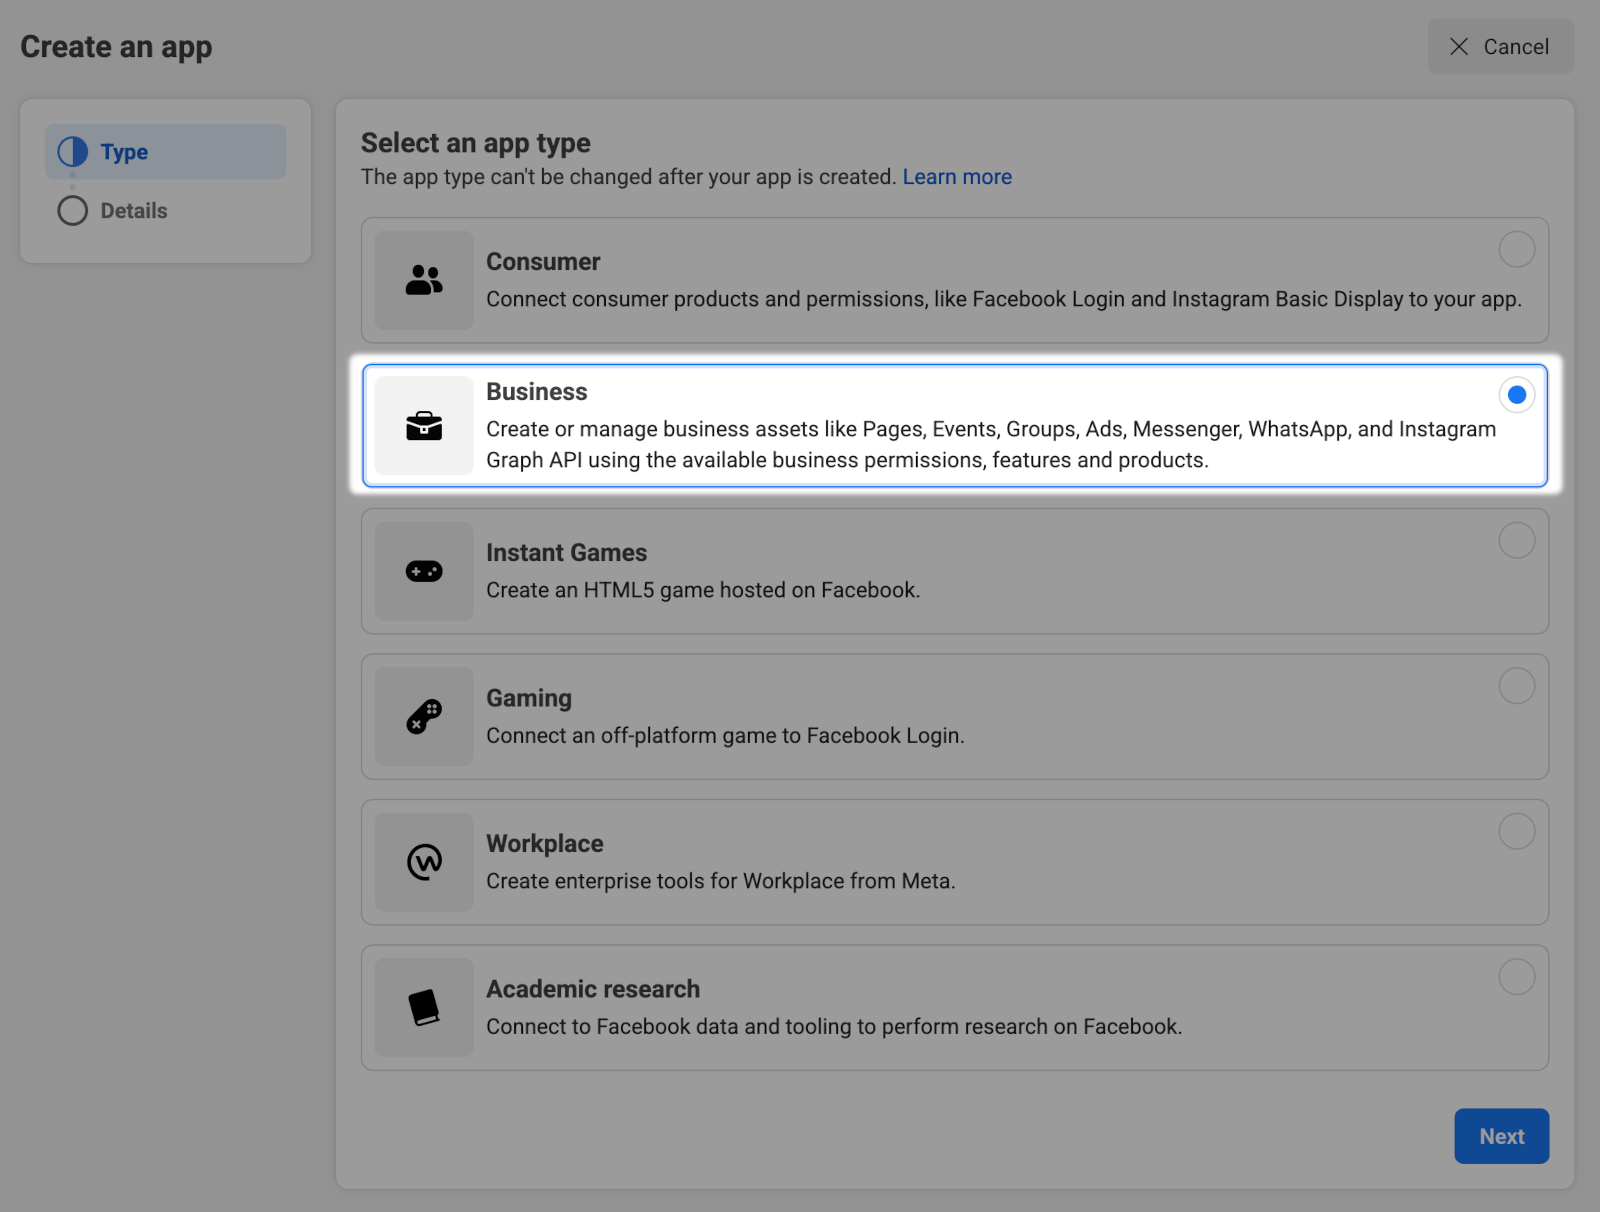
Choose Connect with customers through WhatsApp as use case:
Choose a business portfolio, in case you have more than one:

Check if additional steps are required and follow them. In case everything is fine, you should see a screen like this:

After that, you will see a summary of your configuration. Check if everything is correct and go back to the dashboard via the button:

Assign a Phone Number
In the app dashboard, first re-open the configuration:

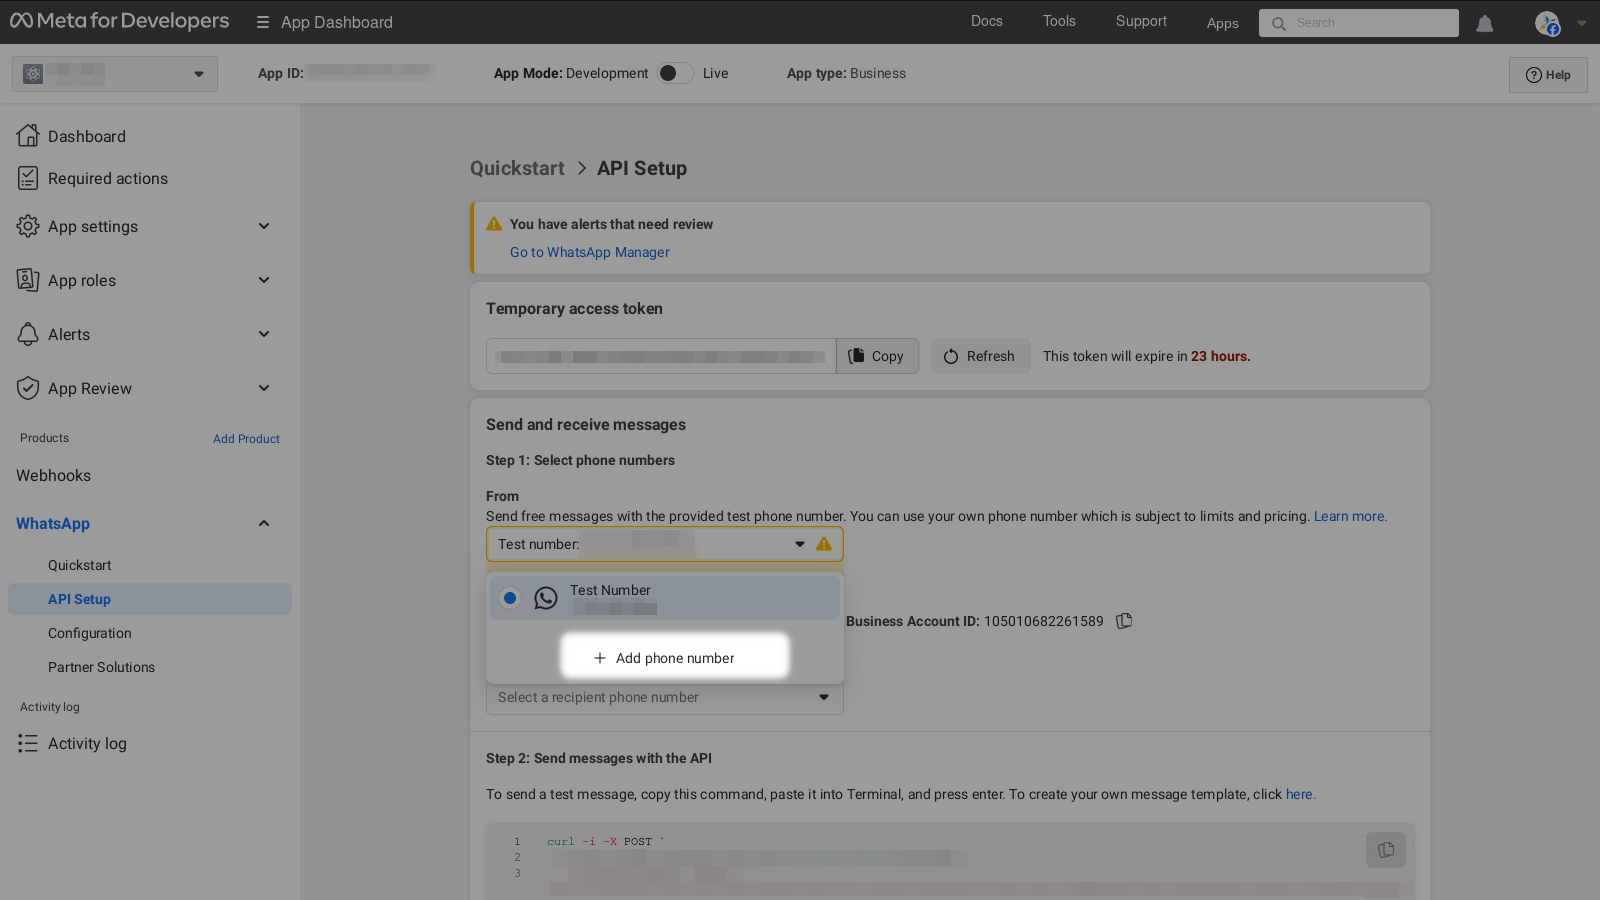
Now go to API Setup and choose or add a phone number.
Warning
This number may not be used in a WhatsApp app already, not even in a WhatsApp Business app.
In case you want to test it with a provided test number or you don’t receive messages after the complete setup, additional steps might be required (see Reddit thread and Meta’s Managing Webhooks documentation).
Click through the steps adding your information. You have to verify your number by receiving a security code and repeating it when asked. After you successfully performed these steps, you are now good to go with the channel setup on Zammad side.