Channel Setup
First of all, make sure to match the prerequisites and to read the limitations. If this is not the case, first go to the preparation page and come back after you followed the steps there.
To set up the channel in Zammad, head over to the admin settings to add the
WhatsApp channel under Channels > WhatsApp, click on Add Account and
follow the steps below.
Step 1
Add your credentials of your account/app in Zammad. The dialog looks like this:
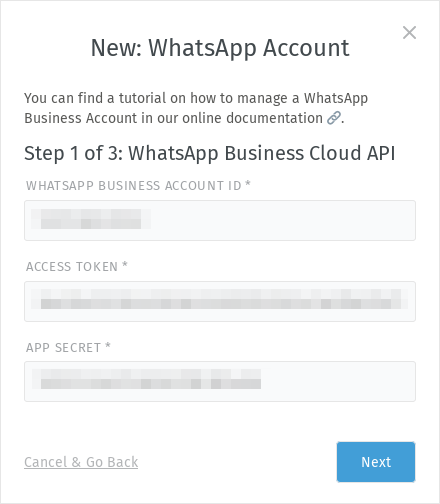
- WhatsApp Business Account ID
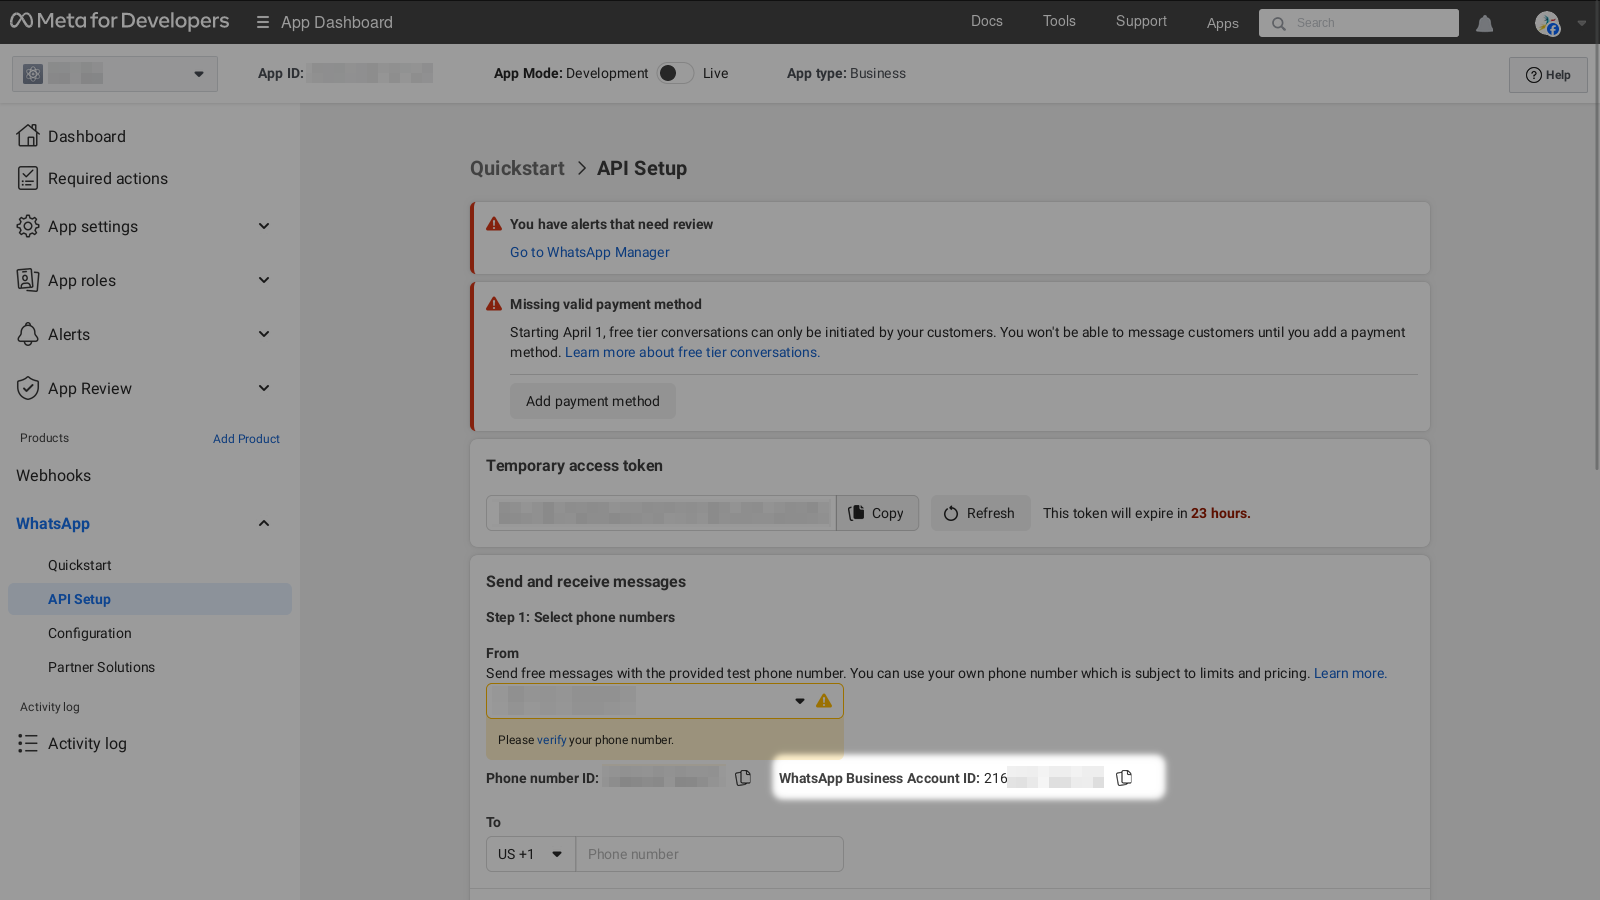
Configure your app on Meta’s developer page and switch to API Setup. In case you have more than one phone number, make sure to select the right one before you copy the Business Account ID, because the ID is tied to the number.
- Access Token
Enter the access token of a system user with the permission to manage the app. You can create it in the business settings under Users > System users. Make sure to assign the created app to the system user (“Assign assets”) and to grant admin access by enabling the Manage app toggle. After clicking the
Generate tokenbutton, choose your created app, an expiration date of the token (we recommend “Never”) and the permissionswhatsapp_business_managementandwhatsapp_business_messaging. Be aware that you have to copy the token, it is just displayed once!
- App Secret
Enter your app secret. You can find it in your app configuration under App settings > Basic. Click the
Showbutton to be able to copy it.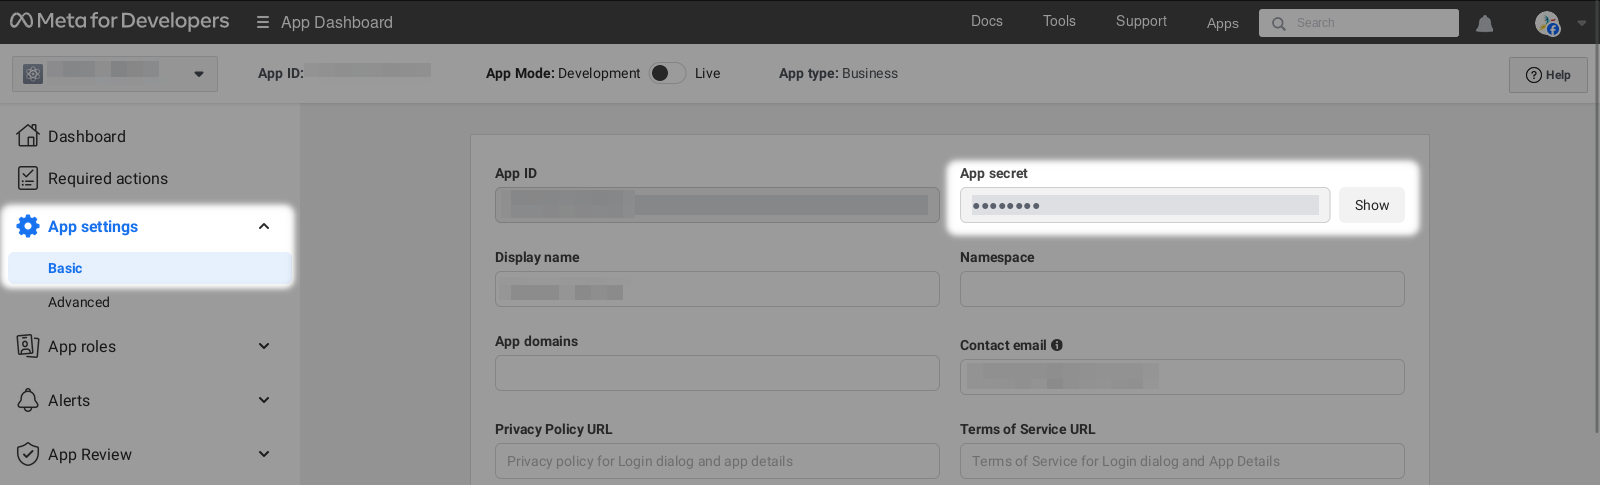
After providing these three values, click on Next in Zammad. This performs
a check and fetches your assigned phone number. If everything is fine, the
dialog switches to the next step.
Step 2
The second step is about your phone number and messaging details:
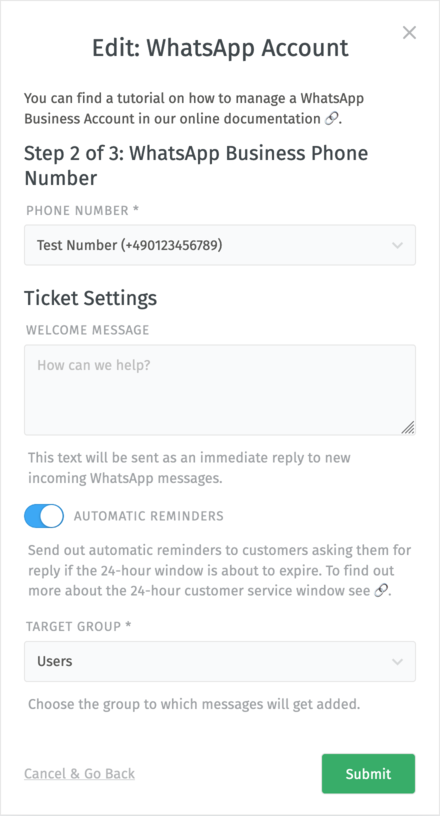
- Phone Number
Choose the phone number you want to use for the channel. Zammad should have fetched the number which is assigned to your app. If not, your credentials from step 1 may be wrong.
- Welcome Message
Here you can define an optional text message which is automatically sent to your customers when the initial message is received.
- Automatic Reminders
Here you can control whether the automatic reminders about the customer service window are sent to the customer when the window is about to expire.
For more information on 24-hour customer service windows, take a look at Meta’s conversation description under “Customer Service Windows”.
- Reminder Message
If you want to use a custom reminder message before the 24-hour customer service window closes, you can insert it here. Leave it empty to stay with the default message.
- Group
Here you can define the group in which the ticket should be created.
After you are configured everything, click on Submit. Now the
WhatsApp channel is technically created on Zammad side. However, you need to
take another important step to make it work.
Step 3
This third step is about telling WhatsApp where, how and what data to send.
Warning
If you don’t follow the instructions properly, your account shows up but you aren’t able to receive messages (because Meta/WhatsApp doesn’t know where to send them)!
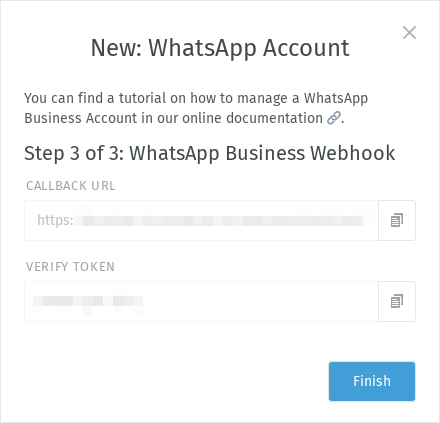
Go to Use cases > Configuration and copy/paste the values from
Callback URL as well as Verify Token from Zammad. Confirm with
Verify and save.

Scroll down and switch on the toggle for messages under Webhook fields.

After finishing this step, you can click on the Finish button in Zammad
and you should now be ready to receive tickets from your WhatsApp channel!
Troubleshooting
No Messages Incoming
If you followed all the steps but you don’t receive any messages, check if the used number is connected to WhatsApp Business Account. In some cases, you also need to manually subscribe to your WABA/app to get notifications and new messages. Have a look at Meta’s Managing Webhooks documentation for more information.