Microsoft Teams Notifications
Warning
Microsoft decided to retire their Office 365 connectors. The new way of connecting Microsoft Teams with third-party tools is via Workflows in Teams.
In the transitional period, we decided to keep this guide as is. Make sure to follow Microsoft’s guide as a replacement for step 1 below, to connect Teams and Zammad via Workflows.
If you already use this webhook and didn’t customize the payload, the new webhook is used automatically after updating Zammad. In this case, you just need to create the workflow for your channel in Microsoft Teams. Otherwise you have to manually adjust the payload in Zammad, too. See Microsoft Teams Payload where you can find the old and new defaults in case you need it.
To manage the connection in Zammad, you can go on with step 2 on this page.
Follow the steps below to configure a webhook for receiving Zammad notifications in a Microsoft Teams channel.
Step 1 - Setup Incoming Webhook Connector in your Teams Channel
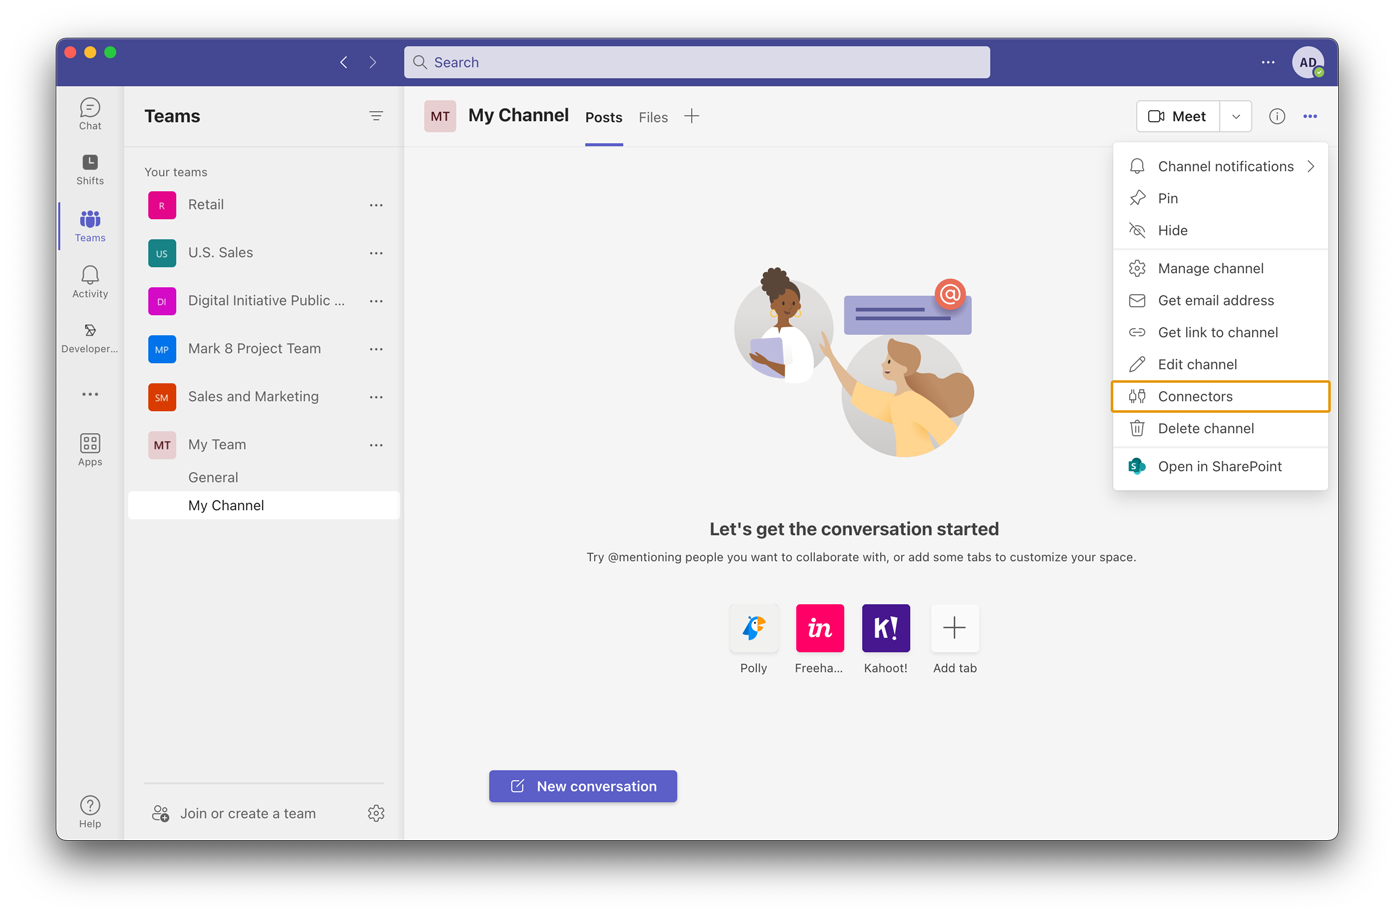
In your target Teams Channel, click on the overflow menu in the upper right corner and choose Connectors.
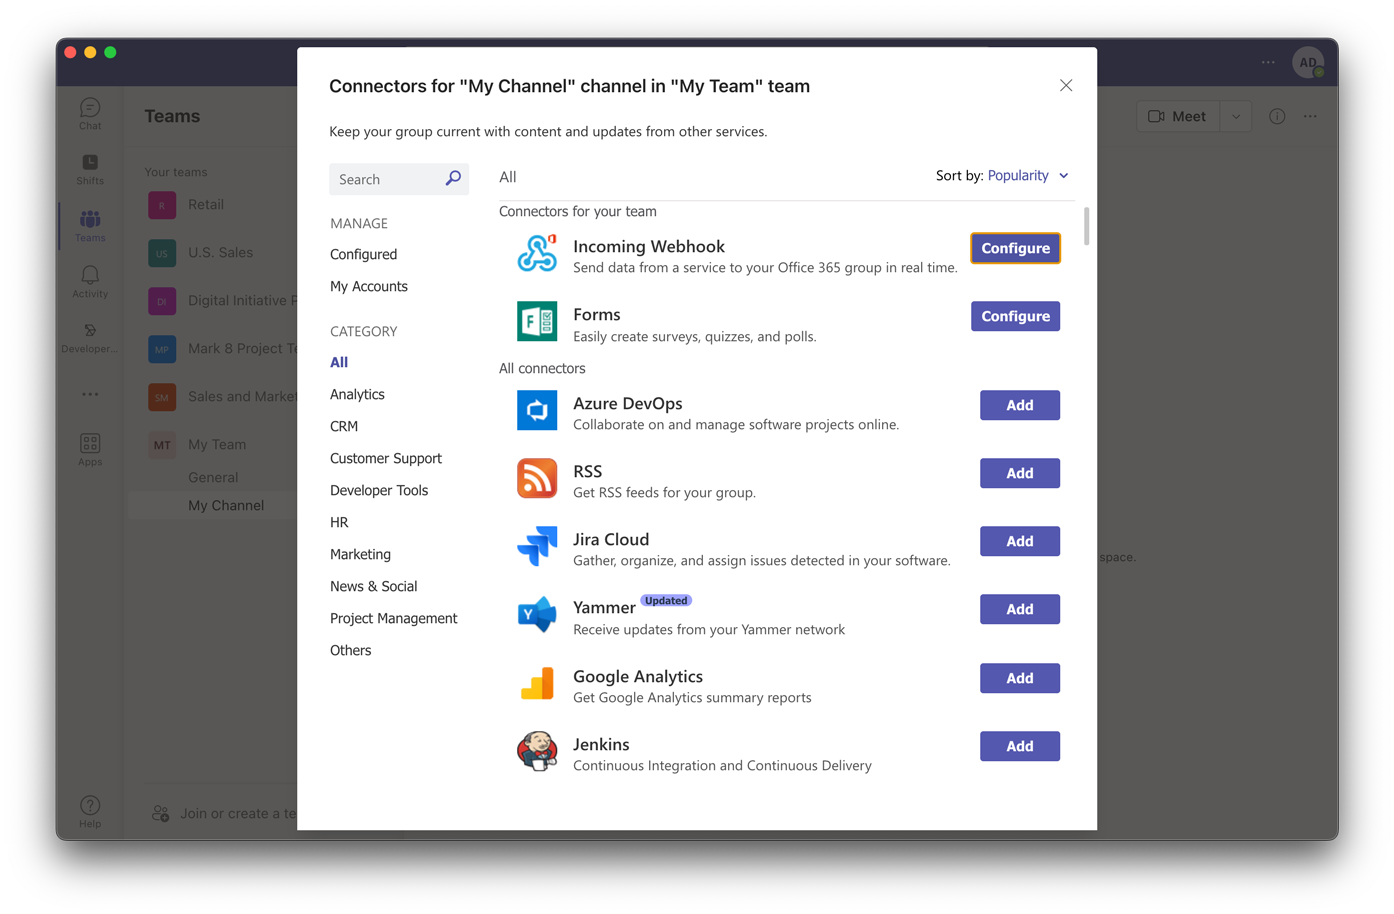
Find a connector named Incoming Webhook in the list and click on
Configure button next to it.
Provide an appropriate name for the incoming webhook connector, keeping in mind this will be used as the name for all of the notification messages in the channel.
Optionally, provide a custom image which will be used as the avatar.
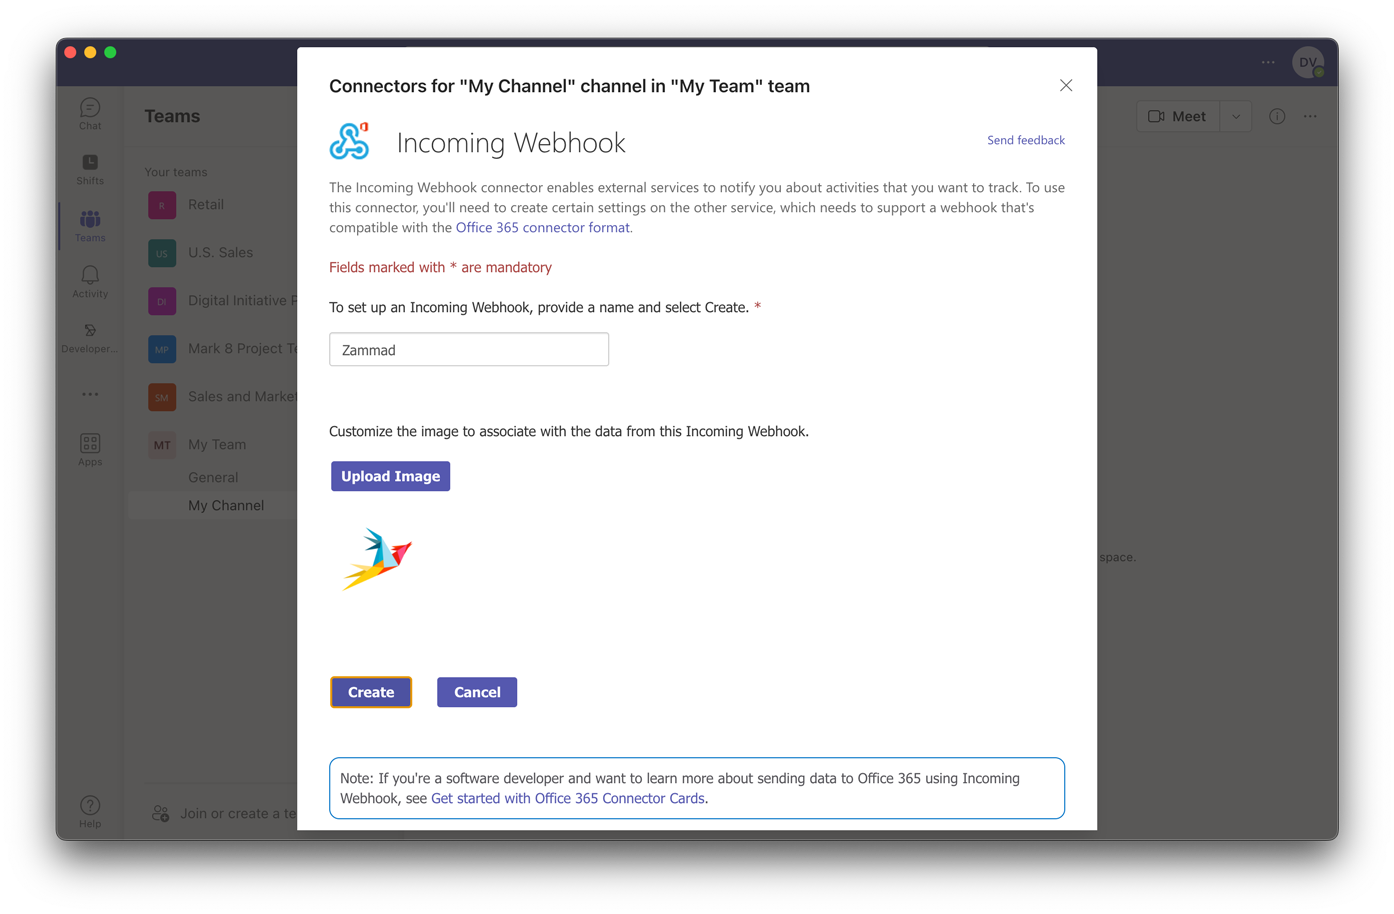
Click on Create and be patient.
Once created, make sure to copy the webhook endpoint URL to clipboard and save it for later. You can do this in one click via the button shown right next to the field.
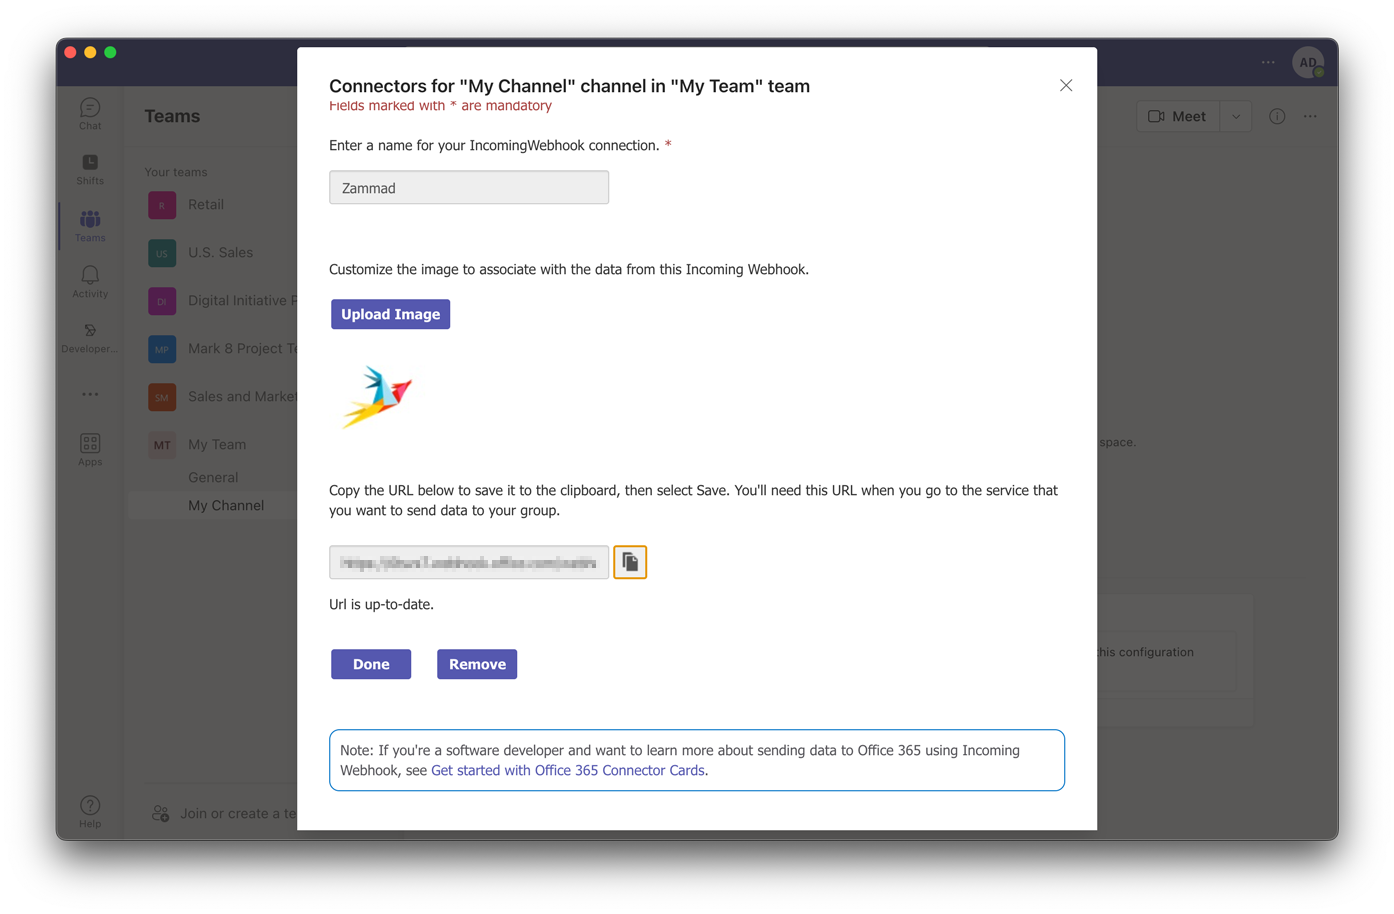
Finally, close the connector configuration by clicking Done.
Step 2 - Add a Pre-defined Webhook in Zammad
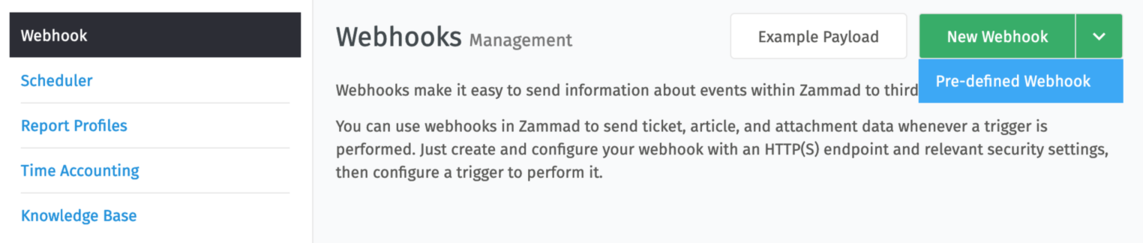
Go to Webhook management screen in your Zammad instance and click on the arrow next to the green button in the upper right corner. Choose Pre-defined Webhook from the dropdown menu.
In the subsequent modal dialog, select Microsoft Teams Notifications as the pre-defined webhook.
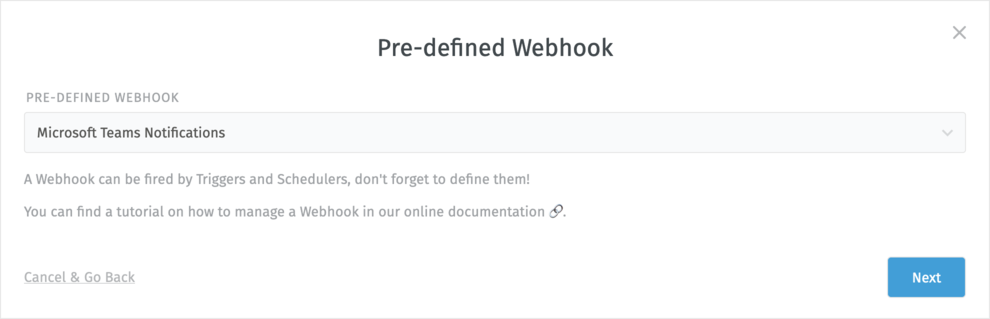
Click Next.
In the new dialog, paste the webhook endpoint URL from Microsoft Teams into Endpoint field.
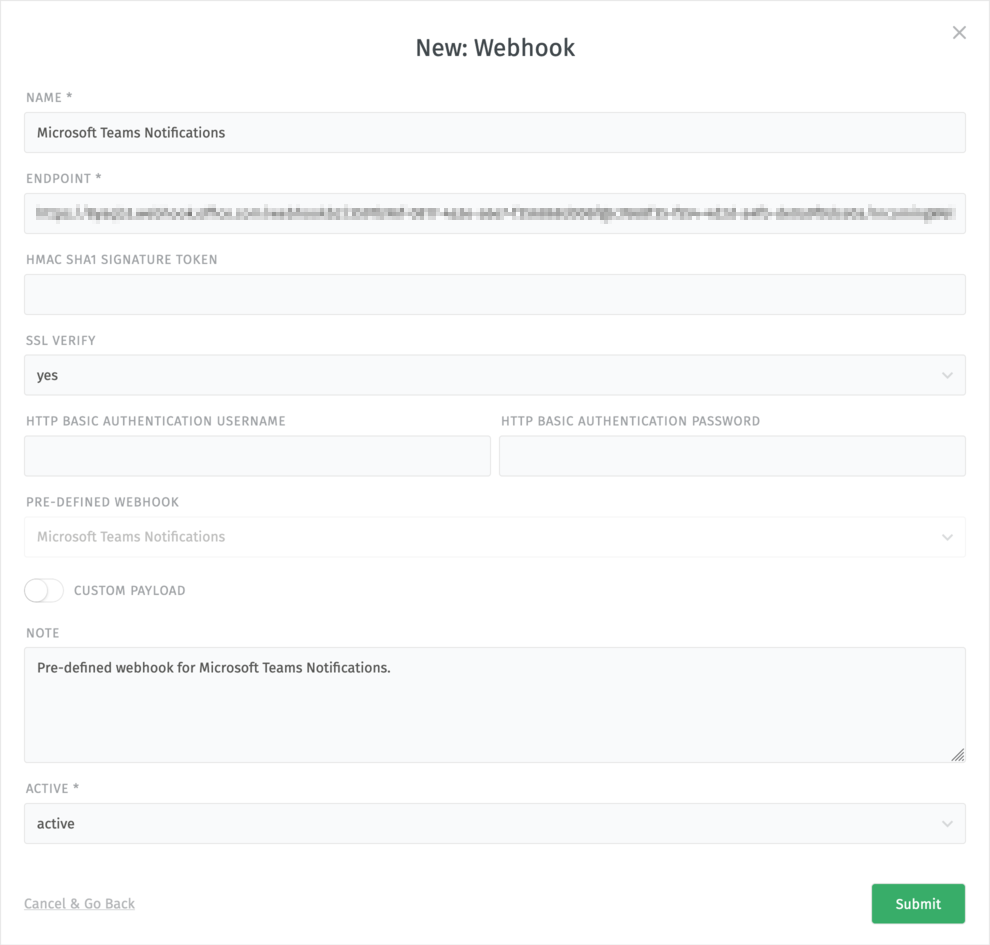
Finally, click on Submit.
Step 3 - Configuring a Trigger for firing of the Webhook
As a last step, you need to create a Trigger for posting a notification to the Microsoft Teams channel under certain conditions.
Once the trigger is in place, your webhook is ready for use!
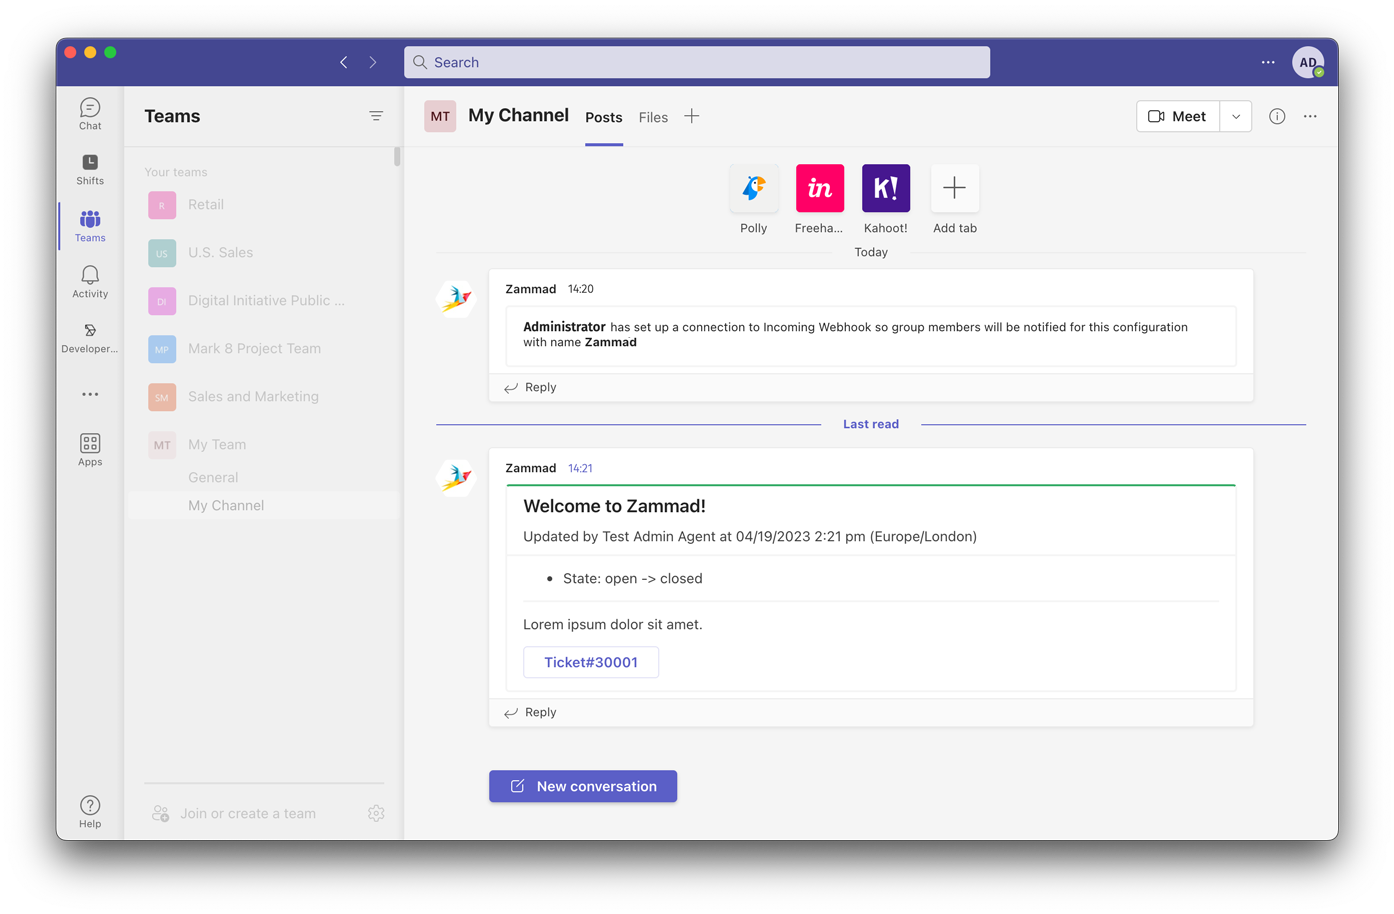
Sample Teams Channel Notification
From now on, whenever a ticket is created or updated in your Zammad system, a suitable notification will be posted in the configured Teams Channel. The notification will contain the link to the ticket, updated data and content of the last article. It will also also be color coded according to its latest state.
Removing Article Content from the Teams Notification
If you are concerned about leaking sensitive article content via notifications, there is a way to remove them by further customizing the webhook payload.
Find your webhook in the list on the management screen and click on it to edit it.
Switch on Custom Payload and the code editor below will be shown, pre-populated with the default payload.
Next, identify { "text": "#{notification.body}" } block in the JSON
structure and select it. Be sure to include the comma (,) in the preceding
line, since the new payload must remain a valid JSON value.
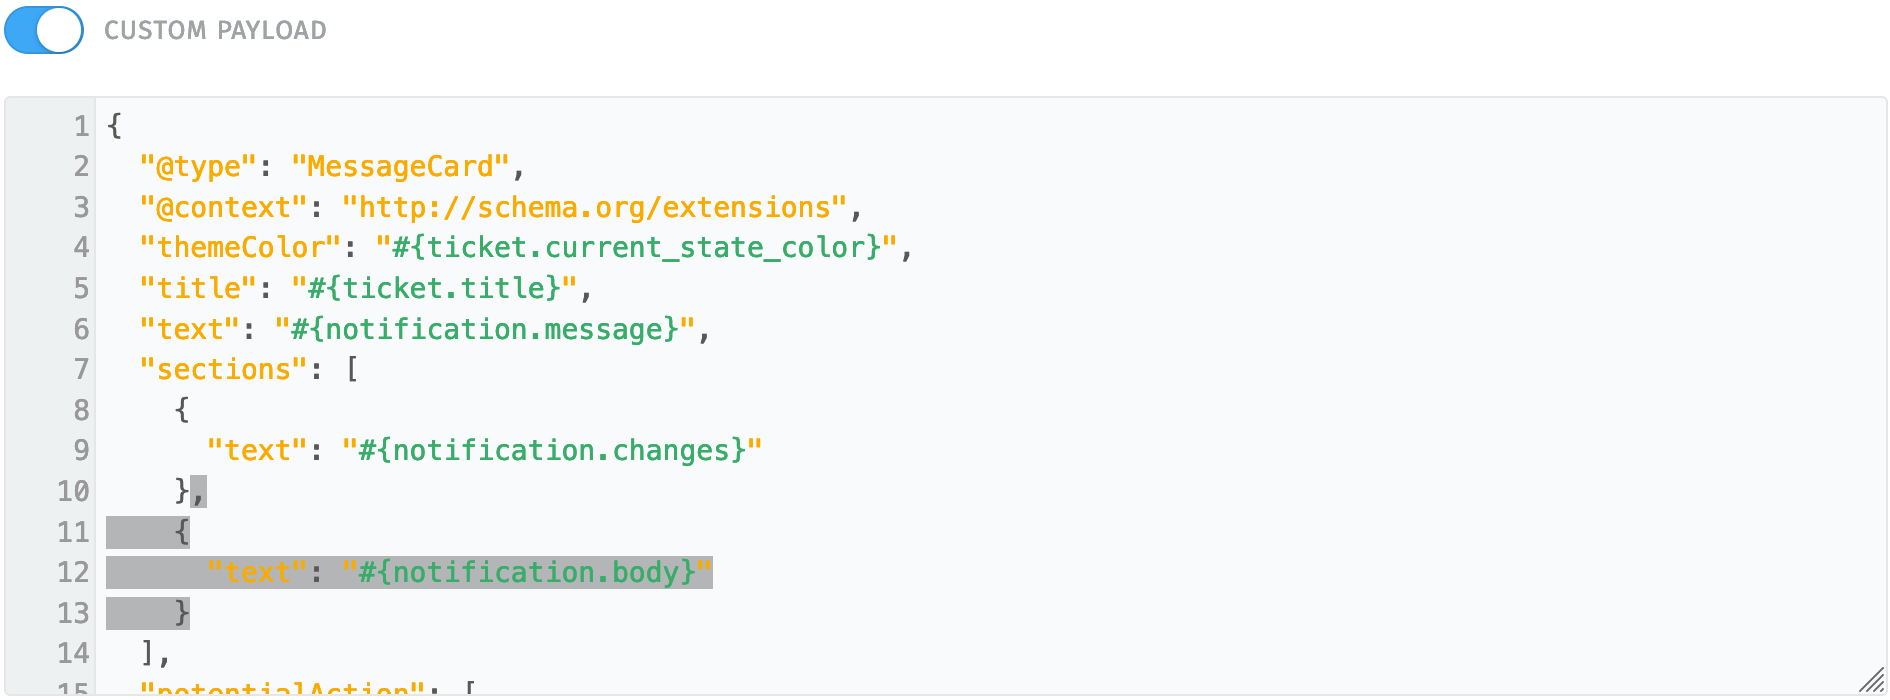
Then, simply delete the selected code block.
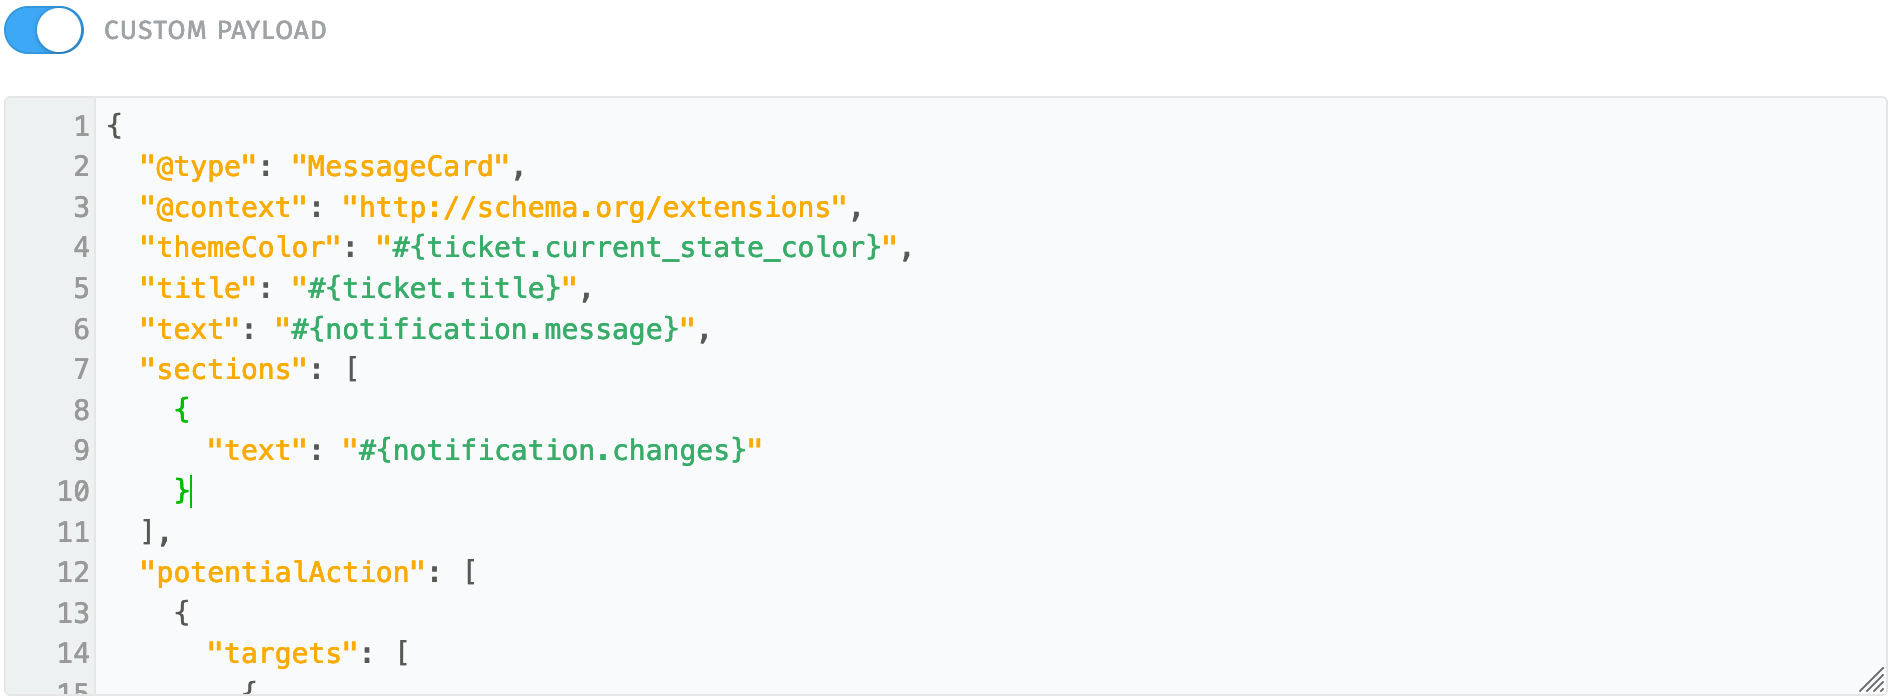
Finally, click on Submit to save your webhook changes.
On the next invocation of the webhook, the notification will not include content of the last article.