Account Setup
After you’ve registered Zammad as an OAuth app in your Entra admin center, you can begin connecting Microsoft accounts to Zammad.
☠️ But first, a word of warning! The import process does things you might not expect:
Danger
By default, Zammad will delete all emails in your inbox during the import process. Use the Keep Messages on Server setting to disable this behavior.
Zammad will send an auto-reply message to every email it imports (including the old ones!). Make sure to disable this behavior prior adding an email account, and to turn it back on once all your messages have been imported.
Tip
🤓 Shared mailboxes are possible…
For this to function ensure to set a password for the account in question. You’ll need these credentials to authenticate against later during adding the account.
🚛 Migrate an Existing Email Channel
If you’ve already added your Microsoft 365 account as a regular email channel, you’ll have to convert it to a Microsoft 365 channel eventually: Microsoft is planning to end support for simple password authentication in third-party email clients (like Zammad).
Please refer the Migrate From Email Channel to Microsoft 365 Channel guide.
Requesting Administrator Consent
This step is only required if you didn’t consent the permissions in App registration as administrator on behalf of your users. If you do not use this kind of security measurement, simply skip to Add a New Account.
- Requesting the consent
Within Zammad click on
Request Admin Consentin order to request consent from your administrators. This is required in some tenants.If your admin already provided consent, you’ll be automatically authenticated, if this happens, continue with Add a New Account.
After authenticating against Microsoft and providing a reason for your request, you’ll be redirect to the Zammad app. Zammad will then tell you to wait for your administrators consent. The consent grant or denial will be sent by mail.
- Granting the consent (admin users)
Within Enterprise applications in the Entra admin center, go to Admin consent requests. You’ll find all your user grant requests here.
Clicking on a request allows you to review which user requested the consent for what app. Click on Review permissions and consent to start the grant process. You’ll be asked for credentials - these credentials are the administrator credentials not the ones of the mailbox user to add.
After you’ve granted the request, continue with “Add a New Account” below.
Add a New Account

Click Add Account to connect your Microsoft 365 accounts to Zammad.
You will be redirected to a Microsoft sign-in and confirmation page. Enter
your credentials and confirm it by clicking the Accept button.
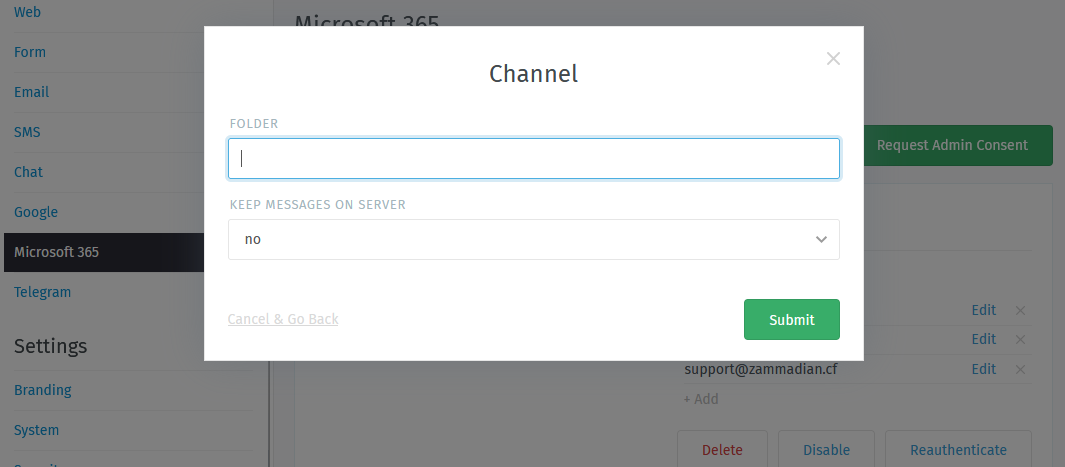
Channel
- Destination group
The group that incoming emails will be assigned to.
Use filters for more fine-grained sorting of incoming email.
- Destination group > Sending email address
Decide if the email address should be assigned to the selected group for outgoing emails.
Change to … will add this email address to the group for outgoing emails. This may overwrite an already assigned email address.
Do not change email address doesn’t assign an email address to the group or change it. If the group has no assigned email address, it stays empty. If the group already has an assigned email address, it will stay the same.
- Folder
Specify which folder (or label) to fetch from, or leave empty to fetch from
INBOX.If specifying a nested folder, be sure to use the full path; e.g.
Inquiries/Tech-Support.- Keep messages on server
Specify what happens to your emails after Zammad imports them:
noZammad deletes all imported messagesyesZammad marks imported messages as read(With this option, Zammad will only import unread messages. This means Zammad may miss messages if the mailbox is externally modified.)
Note
Why does Zammad delete messages by default?
If you never clean up your inbox, you reach a storage limit some day and your mail server will start rejecting incoming messages.
If you choose yes here, remember that it’s your responsibility to clean out your inbox from time to time to keep it below its storage limit.
- Archive Mode
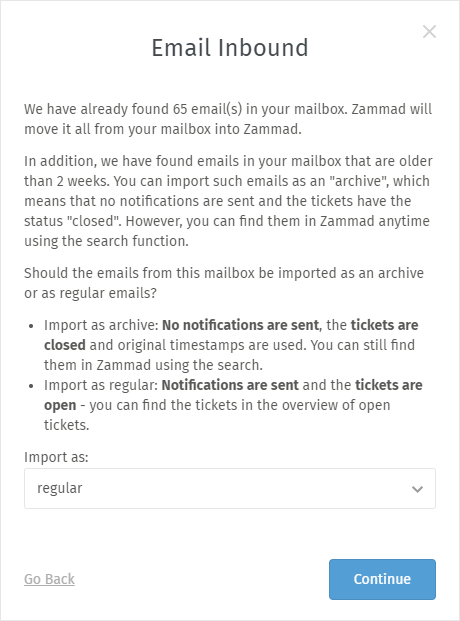
How should old emails be imported?
During the process of setting up an email based channel, Zammad checks if emails are present in the inbox. If Zammad detects at least one email, the archive mode dialog is triggered and the archive mode is turned on by default. This dialog is also present if you edit an existing email based channel. The archive mode lets you:
Set an archive cut-off time, which means: older emails are imported in archive mode, newer ones as standard tickets (including auto-reply messages and in state “new”).
Select a target state for the archived emails: in most cases you might want to import these archived emails in “closed” state. However, if your use case is different, you can choose another one which fits for you.
By archiving emails, their creation date and time is preserved and no automatic actions (e.g. trigger with auto-reply) will take place. If imported as regular tickets, the date and time is always the time of the import.
To import all emails as regular tickets, just turn the archive mode toggle off.
Danger
If you turn off the archive mode, Zammad treats all emails (even old ones) as if they had been sent today. This means senders will receive auto-replies and tickets are created with state “new” for each message.
If you want to differentiate even more, you have to do it manually and disable things like triggers before adding an email account, depending on your use case.
- After adding the account
After successfully adding the Microsoft 365 mail account, you can adjust the default group Zammad is going to assign incoming new tickets to by clicking the group name under “Destination Group”:
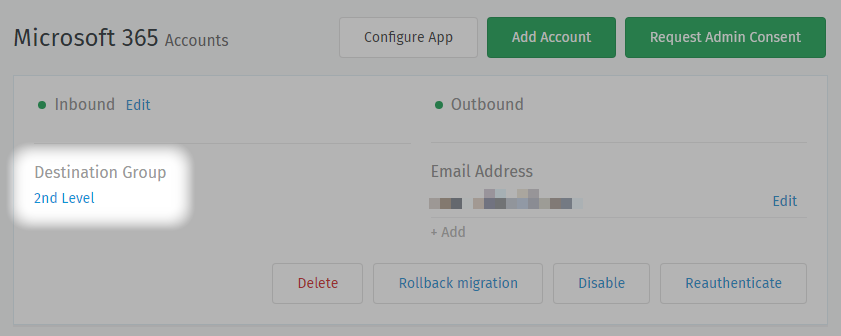
Only active groups will be displayed.
Changing this setting will not reassign existing tickets to the new group.
Hint
If you did not assign the email address to the group, make sure to check now if the correct email address is assigned to the group.
Otherwise, the agents in this group will not be able to send e-mails.
Troubleshooting
- I successfully added my account, but Zammad isn’t fetching new email
If you specified a custom folder/label to fetch from, are you sure incoming mail is arriving in that folder?
- My mailbox was working fine but suddenly it fails with
EXPUNGE FAILED This is a Microsoft 365 specific issue which you have to solve with Microsoft. However, you can have a look at Microsofts documentation which might allow you to solve the issue on your own.
As soon as the issue has been fixed, the Zammad channel will recover automatically.
Have a look at the common errors section if you still face issues with your M365 account.